Love this? Save it for later!
Share the inspiration with your friends
I was standing in the grocery store aisle last Tuesday, staring at a bag of baby carrots like it held the secrets to the universe, when the smell hit me. It wasn’t carrots, though — it was the faint, almost imaginary scent of ranch dressing powder mixing with something crisp and cold. And suddenly I was seven years old, sitting cross-legged on my Aunt Carol’s linoleum floor, watching her pack my lunchbox with what she called “a little garden.” She’d arrange bright strips of bell pepper and cucumber in a tiny container, drizzle something creamy on the side, and tell me it was a rainbow I could eat. I never understood why she called it that until now.
Aunt Carol wasn’t really my aunt — she was our next-door neighbor, a retired nurse with a laugh that sounded like a tea kettle whistling. She had this way of making vegetables feel like a secret treasure, not a chore. Every afternoon before kindergarten, I’d knock on her screen door and she’d hand me a lunchbox full of color. I honestly haven’t thought about those little rainbow cups in years. But there I was, clutching a bag of carrots like an idiot, trying not to tear up in the produce section. Maybe you’ve been there — that random moment when a memory ambushes you and suddenly you’re trying to remember a recipe from twenty years ago.
So I went home and started experimenting. I wanted to recreate that feeling, not just the dish. The crunch, the coolness, the way the ranch clung to every vegetable strip like it belonged there. These Easy Rainbow Veggie Ranch Lunchbox Cups are my best attempt at bottling up that childhood magic — and let me tell you, they turned out even better than I remembered. They’re simple enough for a Tuesday afternoon but pretty enough to make you feel like you’ve got your life together. That’s the kind of recipe worth keeping.
Why You’ll Love This Recipe
These Easy Rainbow Veggie Ranch Lunchbox Cups aren’t just another veggie snack — they’re the snack that actually makes you look forward to eating your vegetables. I’ve tested this recipe about seven times in my own kitchen, tweaking the ranch blend and the veggie combinations until everything felt just right. Here’s why I keep coming back to it:
- Quick & Easy : Comes together in under 15 minutes, perfect for busy mornings when you’re scrambling to pack lunches or need a last-minute snack for the kids.
- Simple Ingredients : No fancy grocery trips needed; you likely already have most of these vegetables and pantry staples in your kitchen right now.
- Perfect for Meal Prep : Great for Sunday afternoon prep sessions — make a batch and grab them all week long for school lunches, work snacks, or afternoon cravings.
- Crowd-Pleaser : Always gets rave reviews from kids and adults alike. I’ve watched picky eaters go back for seconds without even realizing they were eating bell peppers.
- Unbelievably Delicious : The homemade ranch dip takes these from basic to absolutely crave-worthy. The texture and flavor combo is next-level comfort food disguised as a healthy snack.
What makes these different from every other veggie cup out there? It’s the little things — the way I blend the ranch seasoning with Greek yogurt for extra protein, the trick to cutting the vegetables so they stay crunchy for days, and the layering method that keeps everything looking fresh and gorgeous. This isn’t just another version of a veggie snack. It’s my best version, perfected after more failed attempts than I care to admit. Honestly, this recipe is the kind that makes you close your eyes after the first bite. It’s comfort food reimagined — healthier, faster, but with the same soul-soothing satisfaction you get from something your grandma used to make.
What Ingredients You Will Need
This recipe uses simple, wholesome ingredients to deliver bold flavor and satisfying crunch without the fuss. Most of these are pantry staples or easy-to-find produce items that won’t break the bank.
For the Veggie Rainbow
- Red bell pepper, thinly sliced into strips (adds sweetness and that gorgeous red color)
- Orange bell pepper, thinly sliced into strips (for the warm orange layer of the rainbow)
- Yellow bell pepper, thinly sliced into strips (I love buying the mini sweet peppers for this — they’re sweeter and crunchier)
- English cucumber, cut into thin rounds or half-moons (the seedless kind stays crunchiest; I’ve learned this the hard way)
- Broccoli florets, cut into small bite-sized pieces (look for crowns with tight, dark green buds)
- Purple cabbage, thinly shredded (for that deep purple pop at the end of the rainbow)
- Cherry tomatoes, halved (optional but adds a nice burst of juiciness)
For the Homemade Ranch Dip
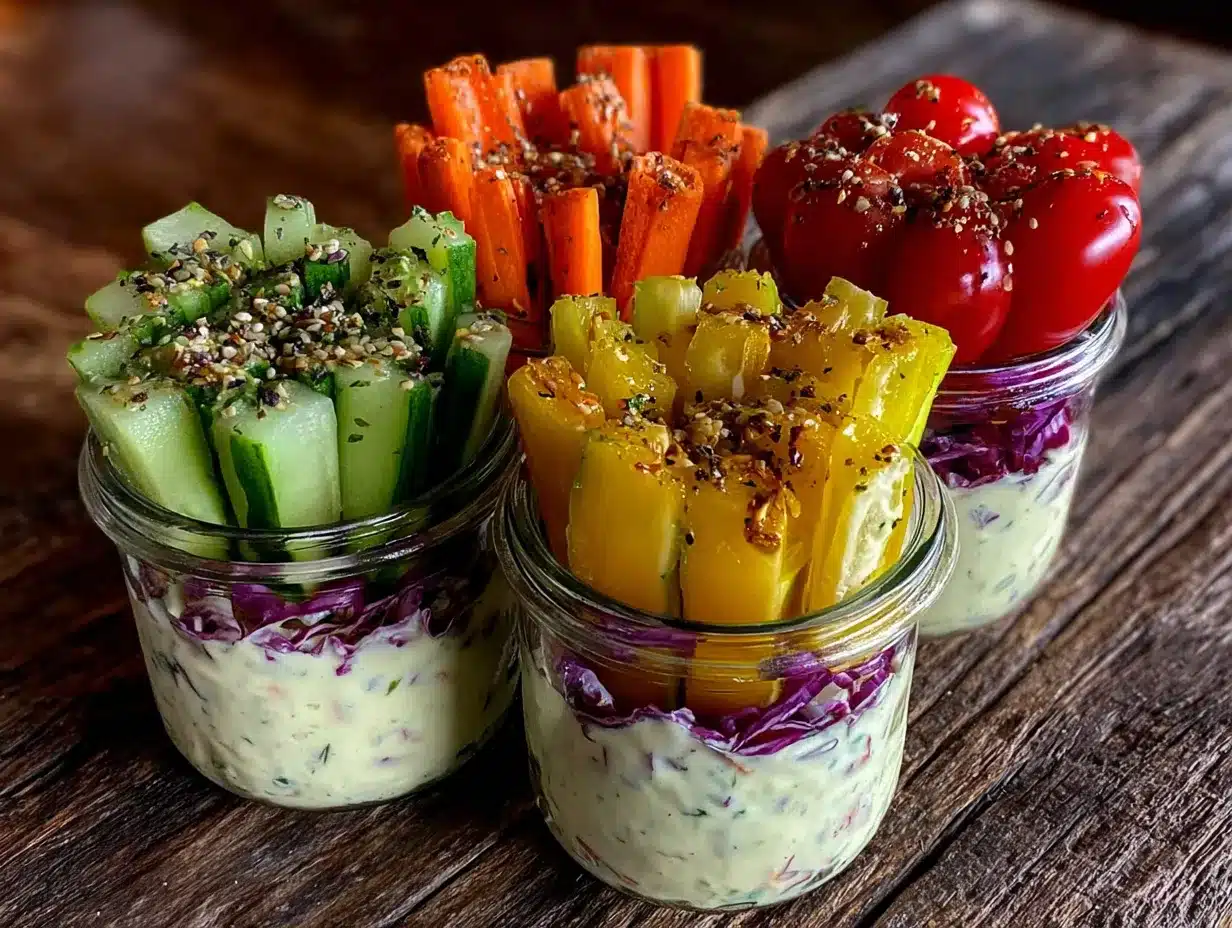
- Plain Greek yogurt, 1 cup (full-fat works best for creaminess, but 2% is fine too)
- Buttermilk, 2 tablespoons (adds that tangy ranch flavor — I use Kate’s brand when I can find it)
- Dried dill weed, 1 teaspoon (this is the secret to authentic ranch taste)
- Garlic powder, 1/2 teaspoon (not fresh garlic — it’s too strong and gets bitter overnight)
- Onion powder, 1/2 teaspoon (adds savory depth without the sharpness of raw onion)
- Dried parsley, 1 teaspoon (for color and that herby freshness)
- Salt, 1/4 teaspoon (or to taste — I use fine sea salt)
- Black pepper, 1/8 teaspoon (freshly ground if you have it)
Ingredient Note: For a dairy-free version, swap the Greek yogurt with a thick dairy-free yogurt like Kite Hill plain unsweetened, and use unsweetened almond milk mixed with a teaspoon of lemon juice instead of buttermilk. The texture will be slightly thinner, but the flavor is still fantastic. I’ve tested this for a friend with dairy allergies and she said it was “better than the real thing” — though I’m not sure I believe her!
Equipment Needed
You don’t need much for these Easy Rainbow Veggie Ranch Lunchbox Cups, which is part of their charm. Here’s what I use:
- Small glass jars or containers with tight-fitting lids (I use 8-ounce mason jars — they’re cheap, dishwasher-safe, and make the veggies look so pretty you’ll want to show them off)
- Sharp chef’s knife and cutting board (a dull knife will crush your bell peppers and make everything look sad)
- Small mixing bowl for the ranch dip (any bowl works, but I love my little Pyrex prep bowls)
- Whisk or fork (for mixing the ranch ingredients until smooth)
- Mandoline slicer (optional, but worth it if you want perfectly even veggie strips — I got mine for $15 at Target and it’s paid for itself in prep time saved)
- Measuring spoons (for the ranch seasoning — eyeballing it never turns out quite right)
Budget Tip: If you don’t have mason jars, any small reusable container works. I’ve used old salsa jars and even plastic takeout containers in a pinch. The key is something with a tight seal so the veggies stay crisp. And honestly, you can skip the mandoline — a sharp knife and a steady hand do the job just fine.
Preparation Method
- Make the ranch dip first (5 minutes). In a small mixing bowl, combine the Greek yogurt, buttermilk, dried dill, garlic powder, onion powder, dried parsley, salt, and black pepper. Whisk until everything is smooth and well combined. Taste it — yes, right now — and adjust the seasoning if needed. I usually add a pinch more dill because I’m obsessed with it. Cover and refrigerate while you prep the veggies. This gives the flavors time to meld together, which makes a real difference.
- Wash and prep all your vegetables (10 minutes). Rinse everything under cold water and pat dry thoroughly. This step is more important than you think — wet veggies get soggy fast. Slice the bell peppers into thin strips about 2 inches long. I like to keep the colors separate so the rainbow effect really pops. Cut the cucumber into thin rounds or half-moons. Chop the broccoli into small florets — no bigger than a bite-sized piece. Shred the purple cabbage thinly using a sharp knife or mandoline. Halve the cherry tomatoes if you’re using them.
- Layer the vegetables in your jars (5 minutes). Start with a couple tablespoons of ranch dip at the bottom of each jar. Then arrange the vegetables in rainbow order: red bell pepper, orange bell pepper, yellow bell pepper, cucumber rounds, broccoli florets, and purple cabbage on top. Press everything down gently so it stays in place. If you’re adding cherry tomatoes, tuck them in between the cucumber and broccoli layers. The key is to pack them tightly enough that they don’t shift around, but not so tight that you crush the vegetables.
- Seal and refrigerate (0 minutes active time). Put the lids on your jars and store them in the refrigerator. These need at least 30 minutes to chill before serving — the cold makes the vegetables crunchier and the ranch dip thicker. I usually make mine the night before and grab them on my way out the door in the morning. They’ll keep for up to 4 days in the fridge, though honestly, they never last that long in my house.
- Serve cold and enjoy (0 minutes). When you’re ready to eat, just grab a jar, unscrew the lid, and dig in. You can eat them straight from the jar or dump everything onto a plate — I prefer the jar because it feels more fun. The ranch dip at the bottom coats every vegetable as you eat your way down. It’s like a treasure hunt of flavors and textures.
Pro Tip from My Kitchen Blunders: The first time I made these, I layered the vegetables in the wrong order and the purple cabbage bled into everything, turning the whole jar an unappetizing grayish color. It still tasted fine, but it looked like something you’d feed a science experiment. Trust me on the rainbow order — it matters for presentation, even if you’re just eating them at your desk.
Cooking Tips & Techniques
After making these Easy Rainbow Veggie Ranch Lunchbox Cups more times than I care to count, I’ve picked up a few tricks that make the process smoother and the results better. Here are my hard-earned lessons:
The Drying Trick: Pat your vegetables bone-dry after washing. I mean really dry — I use a salad spinner followed by paper towels. Any leftover moisture turns your ranch dip watery and makes the vegetables limp by day two. I learned this after opening a jar that looked like a sad swamp. Never again.
The Layering Secret: Always put the dip at the bottom, not on top. If you drizzle ranch over the vegetables, they get soggy and the presentation is ruined. When the dip is at the bottom, you can either dip your veggies as you go or shake everything up to coat them right before eating. It’s a game-changer for texture.
The Crunch Factor: English cucumbers are non-negotiable for me. Regular cucumbers have those big seeds that release water and turn everything mushy. English cucumbers are seedless, crisp, and stay that way for days. Same goes for the bell peppers — look for ones that feel heavy and firm, not soft or wrinkled.
Timing Strategy: I make the ranch dip and chop all the veggies on Sunday afternoon while I’m meal-prepping other things. It takes about 15 minutes total, and then I have grab-and-go snacks for the whole week. The key is to store the chopped vegetables separately from the dip until you’re ready to assemble — this keeps everything at peak freshness.
Common Mistake to Avoid: Don’t skip the salt in the ranch dip. I know it seems like a small detail, but salt amplifies all the other flavors and makes the vegetables taste more vibrant. Without it, the dip falls flat and your rainbow veggie cups will be, well, a little gray. Trust me on this one.
Variations & Adaptations
One of the best things about these Easy Rainbow Veggie Ranch Lunchbox Cups is how customizable they are. Here are some variations I’ve tried and loved:
Protein-Packed Version: Add a layer of diced grilled chicken, hard-boiled egg slices, or chickpeas between the cucumber and broccoli layers. This turns your snack into a full meal that’ll keep you full for hours. I do this when I know I have a long afternoon ahead and won’t have time for a proper lunch.
Dairy-Free Adaptation: Swap the Greek yogurt with a thick dairy-free yogurt like Kite Hill or So Delicious plain unsweetened coconut yogurt. Use unsweetened almond milk mixed with a teaspoon of lemon juice instead of buttermilk. The flavor is slightly different but still delicious — I actually prefer the dairy-free version sometimes because it’s a little tangier.
Seasonal Veggie Swap: In summer, I add fresh corn kernels, snap peas, and zucchini ribbons. In fall, I use roasted butternut squash cubes and apple slices. Winter calls for shaved Brussels sprouts and pomegranate arils. The rainbow theme works with any colorful vegetable you have on hand — just aim for at least five different colors for maximum visual appeal.
Spicy Ranch Version: Add 1/4 teaspoon of cayenne pepper or a dash of hot sauce to the ranch dip for a spicy kick. My husband loves this version and calls them “adult veggie cups.” I’ll sometimes add pickled jalapeño slices to the vegetable layers for extra heat and tang.
Kid-Friendly Twist: Use cookie cutters to cut the bell peppers and cucumber into fun shapes like stars or hearts. My niece goes crazy for these — she calls them “fairy snack jars” and actually eats every single vegetable without complaint. Sometimes presentation is everything with kids.
Serving & Storage Suggestions
These Easy Rainbow Veggie Ranch Lunchbox Cups are best served cold, straight from the refrigerator. The chill makes the vegetables extra crunchy and the ranch dip thick and creamy. I like to serve them as part of a lunchbox alongside a sandwich or wrap, or as an after-school snack that feels more exciting than plain veggies.
Storage Instructions: Keep the jars sealed in the refrigerator for up to 4 days. Do not freeze — the vegetables will turn into a watery mess when thawed. If you’re meal-prepping for the week, I recommend making the ranch dip and chopping the vegetables separately, then assembling the jars no more than 2 days before you plan to eat them. The vegetables stay crunchiest that way.
Reheating: These are meant to be eaten cold — do not microwave them. If you want them at room temperature, let the jar sit on the counter for 10-15 minutes before eating. The flavors actually develop a bit more as they sit, so day-old jars often taste even better than fresh ones.
How Flavors Develop: The ranch dip gets more flavorful after a day in the fridge as the dried herbs rehydrate and meld with the yogurt. The vegetables, especially the bell peppers and cucumber, absorb a tiny bit of the ranch flavor without getting soggy (thanks to the layering method). By day three, these are at their peak — the perfect balance of crunch and creaminess.
Nutritional Information & Benefits
Each serving of these Easy Rainbow Veggie Ranch Lunchbox Cups (one jar with about 1 cup of vegetables and 2 tablespoons of ranch dip) contains approximately:
- Calories: 120-140
- Protein: 8-10 grams
- Carbohydrates: 12-15 grams
- Fiber: 3-4 grams
- Fat: 4-6 grams
- Sugar: 6-8 grams (naturally occurring from vegetables)
Health Benefits: This snack is packed with vitamins A and C from the bell peppers, vitamin K from the broccoli and cucumber, and gut-healthy probiotics from the Greek yogurt. The variety of colors means you’re getting a wide range of antioxidants — each color represents different beneficial compounds. Plus, the protein from the yogurt helps keep you full and satisfied between meals.
Dietary Considerations: This recipe is naturally gluten-free and can be made dairy-free with simple substitutions (see variations above). It’s also vegetarian and can be made vegan by using plant-based yogurt. The only common allergen is dairy (in the yogurt and buttermilk), so be mindful of that if you’re serving to someone with dairy sensitivities.
Conclusion
These Easy Rainbow Veggie Ranch Lunchbox Cups have become a staple in my kitchen for all the right reasons. They’re quick, they’re beautiful, and they make eating vegetables feel like a treat instead of a chore. Every time I pack one in my lunch or hand one to a friend, I think about Aunt Carol and her little linoleum-floor kitchen. She would’ve loved these — the way the colors stack up like a promise, the way the ranch dip ties everything together, the way something so simple can feel so special.
I hope you’ll give these a try and make them your own. Swap in your favorite vegetables, experiment with the ranch seasoning, or add a protein boost for a heartier snack. The beauty of this recipe is that it’s a starting point, not a rulebook. And honestly, that’s what cooking should be — a little bit of structure, a little bit of creativity, and a whole lot of joy.
I’d love to hear how your rainbow veggie cups turn out! Drop a comment below and let me know what vegetable combinations you tried, or tag me in your photos on social media. Your version might just inspire someone else’s next favorite snack. Happy prepping, friends!
Frequently Asked Questions
Can I use store-bought ranch dressing instead of making my own?
Absolutely! If you’re short on time, any store-bought ranch dressing works fine. I recommend a thick, creamy variety — the thinner ones can make the vegetables soggy. Just keep in mind that homemade ranch has a fresher, brighter flavor and lets you control the salt and seasoning levels.
How long do these veggie cups stay fresh in the fridge?
They’ll stay fresh and crunchy for up to 4 days when stored properly in sealed containers. The key is making sure the vegetables are completely dry before assembling and keeping the ranch dip at the bottom of the jar, not mixed in with the veggies.
Can I use frozen vegetables instead of fresh?
I don’t recommend it for this recipe. Frozen vegetables release a lot of water as they thaw, which will make your ranch dip watery and the vegetables limp. Stick with fresh vegetables for the best texture and crunch. If you’re in a pinch, thawed frozen broccoli that’s been patted very dry can work, but it won’t be as crisp.
What’s the best way to cut the vegetables for a pretty presentation?
Thin, uniform strips work best for the bell peppers — about 2 inches long and 1/4 inch wide. Cucumber should be cut into thin rounds or half-moons. Broccoli should be small florets, no bigger than a bite. The key is consistency: when everything is cut to a similar size, the rainbow effect really pops and the eating experience is more enjoyable.
Can I make these for a party or gathering?
Yes, and they’re always a hit! Make individual jars for each guest, or assemble a large platter with the vegetables arranged in rainbow rows and the ranch dip in a bowl on the side. For parties, I like to use clear plastic cups with lids so guests can grab and go. They’re perfect for picnics, potlucks, and backyard barbecues.
Pin This Recipe!
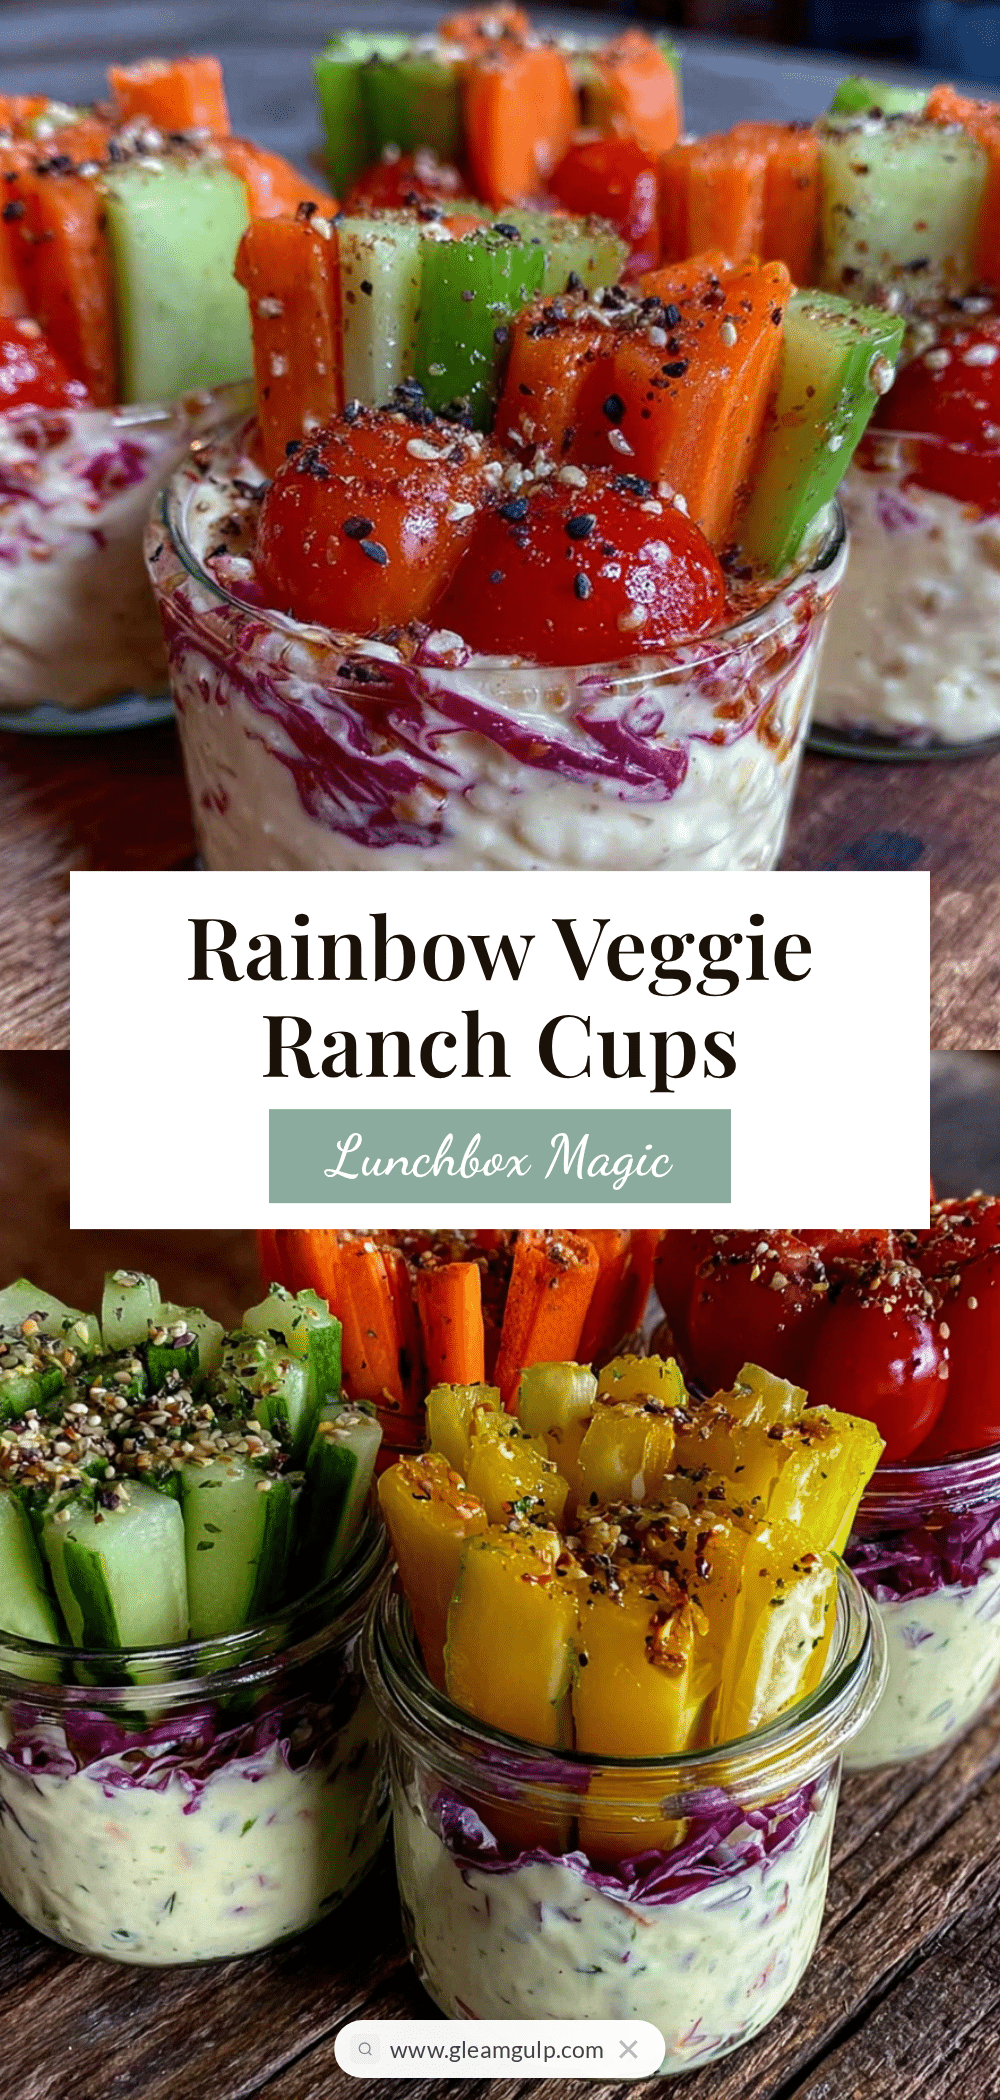
Easy Rainbow Veggie Ranch Lunchbox Cups
These Easy Rainbow Veggie Ranch Lunchbox Cups are a quick, healthy snack that brings back childhood memories. Packed with colorful vegetables and a creamy homemade ranch dip, they’re perfect for meal prep, school lunches, or a fun afternoon treat.
- Prep Time: 15 minutes
- Cook Time: 0 minutes
- Total Time: 15 minutes
- Yield: 4 servings 1x
- Category: Snack
- Cuisine: American
Ingredients
- 1 red bell pepper, thinly sliced into strips
- 1 orange bell pepper, thinly sliced into strips
- 1 yellow bell pepper, thinly sliced into strips
- 1 English cucumber, cut into thin rounds or half-moons
- 1 cup broccoli florets, cut into small bite-sized pieces
- 1 cup purple cabbage, thinly shredded
- 1/2 cup cherry tomatoes, halved (optional)
- 1 cup plain Greek yogurt
- 2 tablespoons buttermilk
- 1 teaspoon dried dill weed
- 1/2 teaspoon garlic powder
- 1/2 teaspoon onion powder
- 1 teaspoon dried parsley
- 1/4 teaspoon salt
- 1/8 teaspoon black pepper
Instructions
- Make the ranch dip first (5 minutes). In a small mixing bowl, combine the Greek yogurt, buttermilk, dried dill, garlic powder, onion powder, dried parsley, salt, and black pepper. Whisk until smooth and well combined. Taste and adjust seasoning if needed. Cover and refrigerate while you prep the veggies.
- Wash and prep all your vegetables (10 minutes). Rinse everything under cold water and pat dry thoroughly. Slice the bell peppers into thin strips about 2 inches long. Cut the cucumber into thin rounds or half-moons. Chop the broccoli into small florets. Shred the purple cabbage thinly. Halve the cherry tomatoes if using.
- Layer the vegetables in your jars (5 minutes). Start with a couple tablespoons of ranch dip at the bottom of each jar. Arrange the vegetables in rainbow order: red bell pepper, orange bell pepper, yellow bell pepper, cucumber rounds, broccoli florets, and purple cabbage on top. Press everything down gently. If adding cherry tomatoes, tuck them between the cucumber and broccoli layers.
- Seal and refrigerate. Put the lids on your jars and store in the refrigerator for at least 30 minutes before serving. They’ll keep for up to 4 days in the fridge.
- Serve cold and enjoy. When ready to eat, grab a jar, unscrew the lid, and dig in. The ranch dip at the bottom coats every vegetable as you eat.
Notes
Pat vegetables bone-dry after washing to prevent soggy dip. Always put dip at the bottom of the jar, not on top. English cucumbers are best for crunch. For dairy-free, use thick dairy-free yogurt and almond milk with lemon juice instead of buttermilk. Store chopped veggies separately from dip until assembling for peak freshness.
Nutrition
- Serving Size: 1 jar (about 1 cup v
- Calories: 130
- Sugar: 7
- Sodium: 250
- Fat: 5
- Saturated Fat: 2
- Carbohydrates: 13
- Fiber: 3
- Protein: 9
Keywords: rainbow veggie cups, ranch dip, healthy snack, meal prep, lunchbox, vegetables, easy snack, kid-friendly


