Love this? Save it for later!
Share the inspiration with your friends
Introduction
The other night, I was waiting in line at the local hardware store—of all places—when the guy in front of me, a quiet sort with grease-stained hands and a calm voice, started chatting about his secret dinner weapon: crispy garlic butter chicken thighs made in an air fryer. I wasn’t expecting cooking advice from a plumber, but there I was, mentally jotting down his method while he detailed how the garlic butter made the skin golden and crisp in a way that no oven could match. Honestly, it felt like a strange kitchen tip smuggled out from under a toolbox.
That cracked ceramic bowl I use for mixing got a little chipped that evening as I rushed to try his recipe, and I forgot to preheat the air fryer the first time—classic me. But the result? Seriously addictive chicken thighs with a crispy skin that sang with buttery garlic flavor. Maybe you’ve been there, craving a dinner that’s quick but tastes like it took hours. This recipe stuck with me because it’s just that kind of magic—simple ingredients, a little patience, and an unexpected source of inspiration. Let me tell you, this is one dinner that keeps me coming back, and probably will for you too.
Why You’ll Love This Recipe
After testing this crispy garlic butter chicken thighs recipe multiple times, I can confidently say it hits all the right notes for a fuss-free, crowd-pleasing meal. Here’s why this recipe is a keeper:
- Quick & Easy: Ready in under 30 minutes, it’s perfect for those hectic weeknights or last-minute dinner plans.
- Simple Ingredients: No need for specialty shopping trips — everything is pantry-friendly, with garlic, butter, and chicken thighs as stars.
- Perfect for Any Occasion: Whether you’re hosting a casual dinner or craving something cozy, this recipe fits right in.
- Crowd-Pleaser: The crispy skin and rich garlic butter flavor get raves from both kids and adults alike.
- Unbelievably Delicious: The technique of finishing the chicken with garlic butter in the air fryer results in next-level texture and flavor.
This isn’t just another air fryer chicken recipe. The trick lies in basting the chicken with garlic butter halfway through cooking, which keeps the meat juicy and the skin irresistibly crisp. I’ve tried other recipes where the chicken turns out dry or the skin stays floppy, but this one nails the balance every time. Honestly, it’s comfort food with a little extra finesse — fast enough to make any night feel special.
What Ingredients You Will Need
This recipe uses straightforward, wholesome ingredients that work together to create bold flavor and satisfying crispiness without fuss. Most are pantry staples, and substitutions are easy if needed.
- Chicken Thighs: 4 bone-in, skin-on thighs (about 1.5 pounds/700g) for maximum flavor and juiciness.
- Unsalted Butter: 3 tablespoons, melted (I like using Kerrygold for that rich, creamy taste).
- Garlic: 4 cloves, minced fresh garlic is key for that punchy flavor.
- Paprika: 1 teaspoon, adds a subtle smoky warmth (smoked paprika works great too).
- Dried Thyme: 1 teaspoon, for a hint of herbal depth.
- Salt and Black Pepper: To taste, freshly ground black pepper for best aroma.
- Olive Oil: 1 tablespoon, helps crisp the skin before air frying.
- Lemon Juice: 1 teaspoon freshly squeezed (optional, but brightens the garlic butter).
- Fresh Parsley: Chopped, for garnish and fresh herbal note.
If you want to switch things up, you can swap the dried thyme for rosemary, or use ghee instead of butter for a nutty twist. For a dairy-free option, coconut oil works well but changes the flavor profile a bit. In summer, adding a sprinkle of fresh chopped rosemary or oregano can add a nice seasonal touch.
Equipment Needed

- Air Fryer: Essential for achieving that crispy skin without deep frying. I use a 5.8-quart model, but a smaller or larger one works too.
- Mixing Bowl: For tossing the chicken with seasonings and butter. A medium-sized ceramic or glass bowl works best to avoid scratching and retain heat.
- Brush or Spoon: To baste the chicken with garlic butter during cooking.
- Tongs: Helpful for turning the chicken halfway through air frying.
- Knife and Cutting Board: For mincing garlic and chopping parsley.
If you don’t have an air fryer, a convection oven can be an alternative, but results will vary. For budget-friendly air fryers, look for models with a basket capacity of at least 3 quarts to fit several thighs comfortably. Keep your tools well-maintained; I learned the hard way that a dull knife makes mincing garlic a messy chore!
Preparation Method
- Prep the Chicken: Pat the chicken thighs dry with paper towels—this step is crucial for crispiness. Season both sides generously with salt, pepper, paprika, and dried thyme. Let them rest for 10 minutes at room temperature to absorb flavors. (Tip: If you’re short on time, seasoning just before cooking works, but resting helps.)
- Make the Garlic Butter: In your mixing bowl, melt 3 tablespoons of unsalted butter. Stir in minced garlic and lemon juice until combined. Set aside but keep warm. This mixture will baste the chicken halfway through cooking.
- Preheat the Air Fryer: Set to 400°F (200°C) and preheat for about 5 minutes. Skipping this step can cause uneven cooking, as I found out the first time I tried the recipe.
- Coat Chicken with Olive Oil: Brush the chicken thighs lightly with olive oil to help crisp the skin when air frying.
- First Air Fry: Place the thighs skin-side down in the air fryer basket in a single layer. Cook for 10 minutes at 400°F (200°C). Avoid overcrowding to keep the air circulating properly.
- Flip and Baste: Using tongs, flip the chicken thighs skin-side up. Brush the garlic butter mixture generously over the skin. Return to the air fryer and cook for another 8-10 minutes. The skin should be golden and crisp, and the internal temperature should reach 165°F (74°C). (Tip: Check the chicken early if your air fryer runs hot.)
- Rest and Garnish: Remove the chicken and let it rest for 5 minutes. Sprinkle with freshly chopped parsley before serving.
Throughout the process, watch for the skin color and aroma. You’ll know the chicken is ready when it smells buttery and garlicky, and the skin crunches when you tap it. If you try this recipe, you’ll probably find yourself turning to it again for that perfect weeknight meal.
Cooking Tips & Techniques
For the crispiest skin, dryness is your friend—pat the chicken very dry before seasoning. Trust me, moisture is the enemy of crispiness. Don’t rush the air fryer preheat; it’s like warming up a skillet, and skipping it can lead to uneven cooking.
Halfway basting with garlic butter is a game changer. Butter alone can burn at high heat, but combining it with basting helps coat the chicken and infuses flavor while keeping the skin from drying out. I learned this trick from that unexpected plumber’s tip, and it’s what sets this recipe apart.
Be careful not to overcrowd the basket. Air fryers cook by circulating hot air, so spacing the chicken allows each piece to crisp nicely. If you’re cooking for more people, do it in batches instead of squeezing everything in.
When flipping the chicken, use tongs gently to avoid tearing the skin. If you want, you can brush a little more garlic butter after cooking for an extra glossy, flavorful finish. Also, for best results, use bone-in thighs — boneless tend to cook faster but lack the same juicy texture.
Variations & Adaptations
- Spicy Twist: Add ½ teaspoon cayenne pepper or chili flakes to the seasoning mix for a little heat that pairs beautifully with garlic butter.
- Herb Swap: Use fresh rosemary or oregano instead of thyme for a different herbal profile. Add fresh herbs on top after cooking for vibrant flavor.
- Gluten-Free: This recipe is naturally gluten-free, but double-check your paprika and spices to avoid any additives.
- Dairy-Free: Replace butter with melted coconut oil or olive oil infused with garlic. The flavor shifts but still delivers great crispiness.
- Oven Method: If you don’t have an air fryer, bake the chicken on a wire rack at 425°F (220°C) for about 30-35 minutes, basting with garlic butter halfway through. The texture won’t be quite the same but still delicious.
Personally, I once added a dash of smoked paprika and a squeeze of fresh lemon after cooking, which gave the chicken a smoky brightness that surprised everyone at the dinner table.
Serving & Storage Suggestions
Serve these crispy garlic butter chicken thighs hot, straight from the air fryer, with a sprinkle of fresh parsley for color and freshness. They pair wonderfully with a simple green salad, roasted vegetables, or creamy mashed potatoes to soak up the buttery garlic sauce.
Leftovers store well in an airtight container in the refrigerator for up to 3 days. To reheat, pop the chicken back in the air fryer at 350°F (175°C) for 5-7 minutes to refresh the crispiness — just don’t overdo it or the chicken might dry out.
Flavors actually develop nicely overnight, so if you’re meal prepping, the garlic butter taste gets even richer. You can also shred the leftover chicken for sandwiches or toss it into salads for a quick lunch.
Nutritional Information & Benefits
Each serving (about one chicken thigh) provides roughly 320 calories, 22g protein, 25g fat (mostly from butter and skin), and minimal carbs. This recipe is a hearty source of protein and healthy fats, making it suitable for low-carb and keto diets.
Garlic brings immuno-boosting properties and adds antioxidants, while herbs like thyme provide additional vitamins. Using bone-in chicken thighs helps retain moisture, delivering satisfying texture and nutrition in every bite. Just be mindful of sodium if you’re watching salt intake; you can reduce added salt as needed.
Conclusion
This crispy garlic butter chicken thighs recipe is a rare find that balances ease, flavor, and that crave-worthy crisp skin perfectly. I love how it turns simple, everyday ingredients into something special, and you can easily tweak it to suit your taste or dietary needs. Honestly, it’s become my go-to when I want dinner fast but still memorable.
Give it a try, and feel free to leave a comment sharing your favorite tweaks or how it turned out for you — I’m always excited to hear about new takes on this favorite. Here’s to many cozy dinners filled with crispy garlic butter chicken goodness!
Frequently Asked Questions
Can I use boneless chicken thighs instead of bone-in?
Yes, but boneless thighs will cook faster and might not be as juicy. Adjust cooking time to about 12-15 minutes total and check internal temperature carefully.
What if I don’t have an air fryer?
You can bake the chicken in a preheated oven at 425°F (220°C) on a wire rack for about 30-35 minutes. Baste with garlic butter halfway through for best results.
How do I prevent the garlic from burning in the butter?
Mix the garlic into melted butter and baste halfway through cooking rather than at the start. This helps the garlic flavor infuse without burning.
Can I prepare this recipe ahead of time?
You can season the chicken and prepare the garlic butter a few hours ahead, then refrigerate until ready to cook. Cook just before serving for best texture.
Is this recipe suitable for freezing?
Cooked chicken thighs freeze well. Cool completely before freezing in airtight containers. Reheat in the air fryer to restore crispiness.
Pin This Recipe!
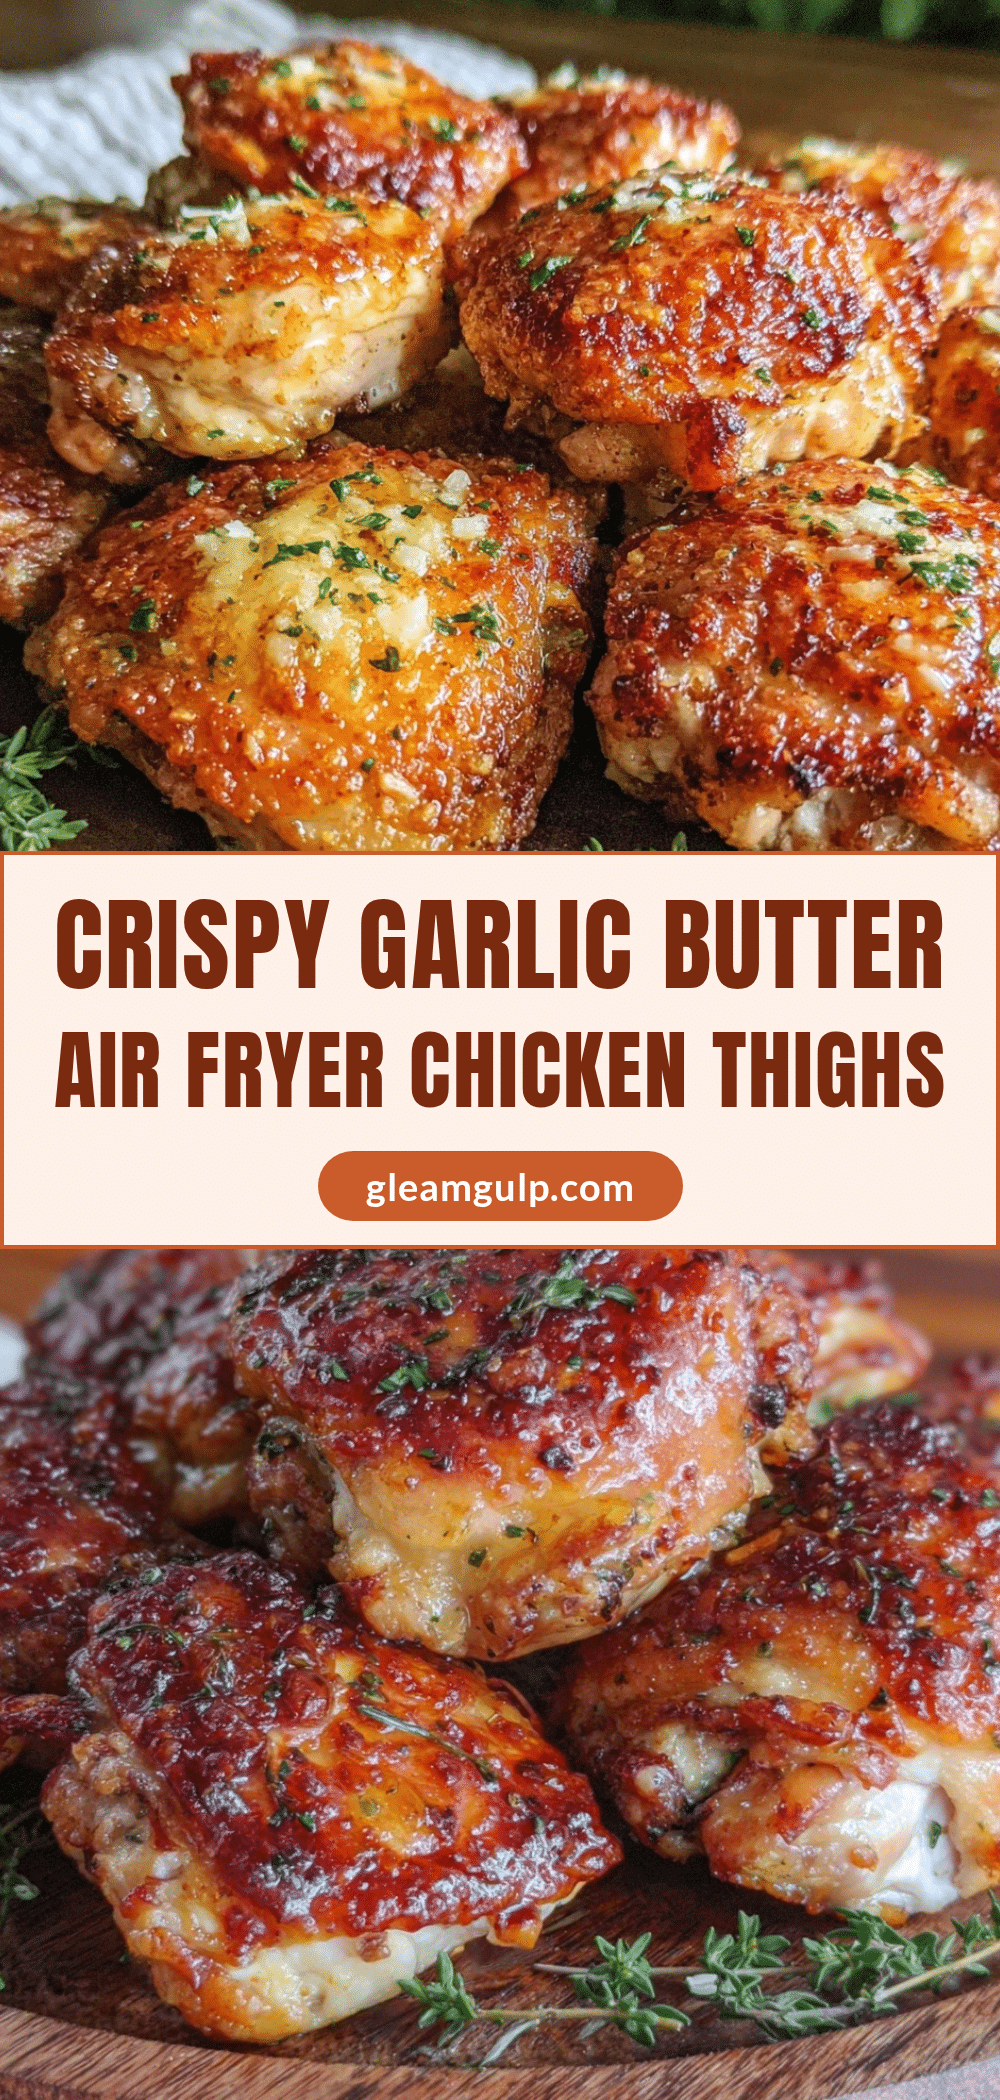
Crispy Garlic Butter Chicken Thighs Air Fryer Recipe Easy Perfect Dinner

This recipe delivers crispy, juicy chicken thighs with a rich garlic butter flavor, cooked quickly and easily in an air fryer for a perfect weeknight dinner.
- Prep Time: 15 minutes
- Cook Time: 20 minutes
- Total Time: 35 minutes
- Yield: 4 servings 1x
- Category: Main Course
- Cuisine: American
Ingredients
- 4 bone-in, skin-on chicken thighs (about 1.5 pounds / 700g)
- 3 tablespoons unsalted butter, melted
- 4 cloves garlic, minced
- 1 teaspoon paprika
- 1 teaspoon dried thyme
- Salt, to taste
- Black pepper, freshly ground, to taste
- 1 tablespoon olive oil
- 1 teaspoon freshly squeezed lemon juice (optional)
- Chopped fresh parsley, for garnish
Instructions
- Pat the chicken thighs dry with paper towels. Season both sides generously with salt, pepper, paprika, and dried thyme. Let rest for 10 minutes at room temperature.
- In a mixing bowl, melt 3 tablespoons of unsalted butter. Stir in minced garlic and lemon juice until combined. Set aside but keep warm.
- Preheat the air fryer to 400°F (200°C) for about 5 minutes.
- Brush the chicken thighs lightly with olive oil to help crisp the skin.
- Place the thighs skin-side down in the air fryer basket in a single layer. Cook for 10 minutes at 400°F (200°C).
- Flip the chicken thighs skin-side up using tongs. Brush the garlic butter mixture generously over the skin. Return to the air fryer and cook for another 8-10 minutes until skin is golden and crisp and internal temperature reaches 165°F (74°C).
- Remove the chicken and let rest for 5 minutes. Sprinkle with freshly chopped parsley before serving.
Notes
Pat chicken dry for best crispiness. Preheat air fryer to avoid uneven cooking. Baste halfway through cooking to keep chicken juicy and skin crispy. Avoid overcrowding the air fryer basket. Use bone-in thighs for juicier meat. For dairy-free, substitute butter with coconut oil or olive oil infused with garlic. Oven baking alternative: bake at 425°F (220°C) for 30-35 minutes, basting halfway through.
Nutrition
- Serving Size: 1 chicken thigh
- Calories: 320
- Sodium: 350
- Fat: 25
- Saturated Fat: 12
- Carbohydrates: 1
- Protein: 22
Keywords: crispy chicken thighs, garlic butter chicken, air fryer chicken, easy dinner, quick chicken recipe, bone-in chicken thighs, garlic butter, weeknight dinner


