Love this? Save it for later!
Share the inspiration with your friends
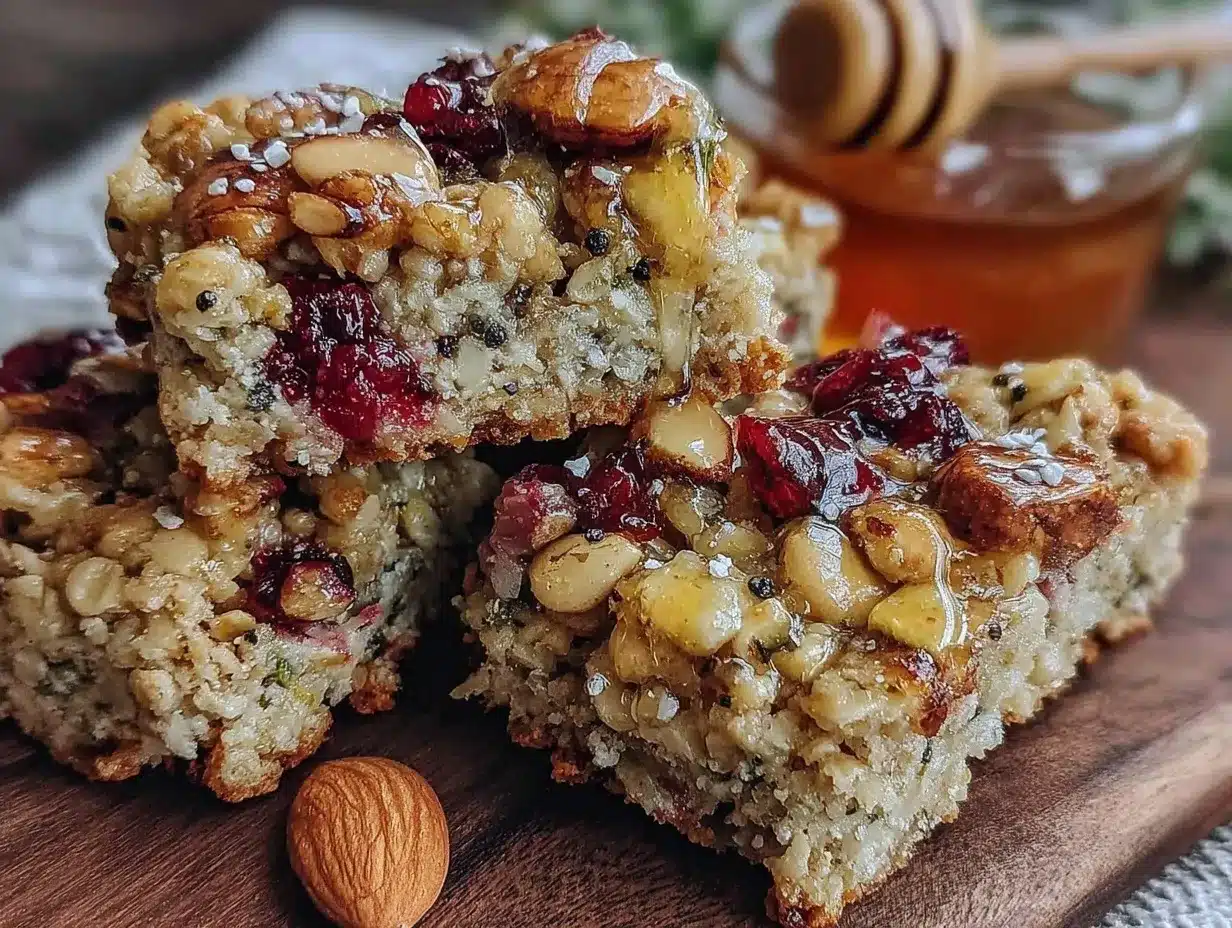
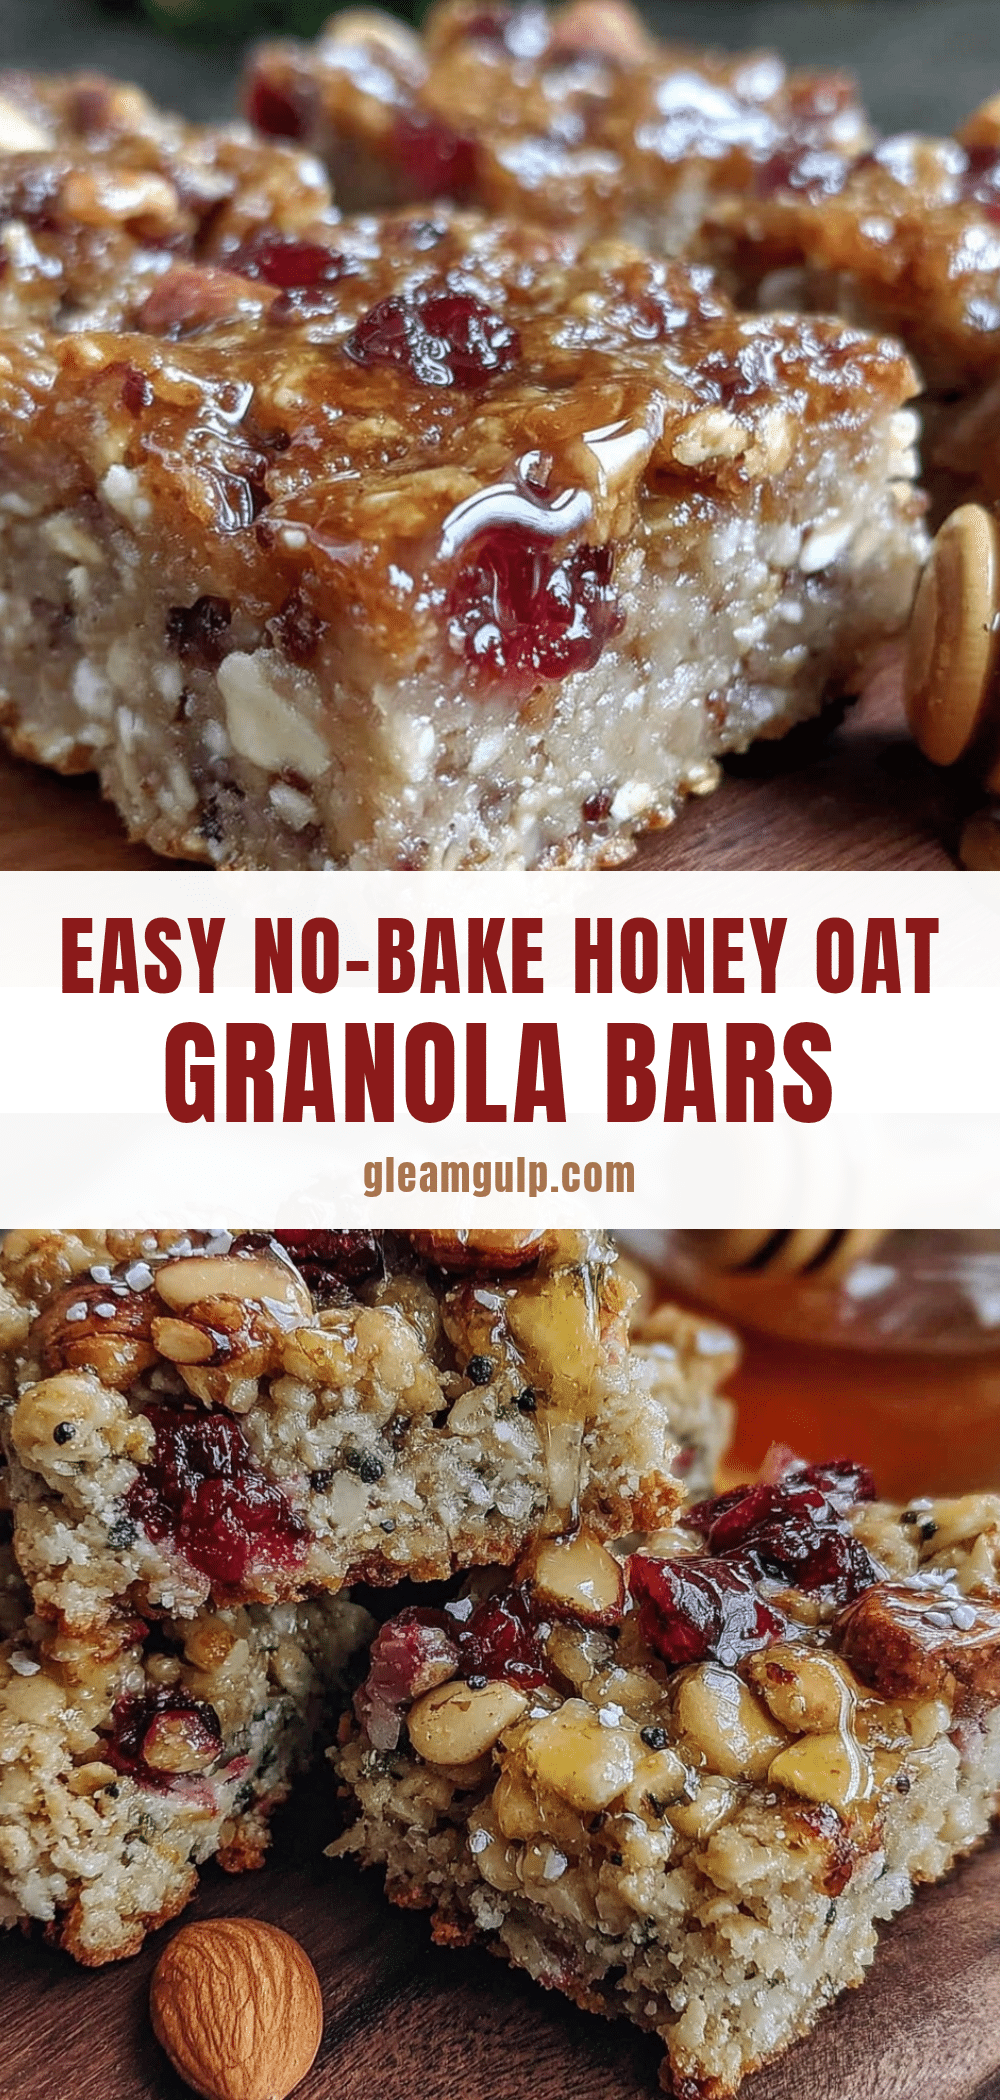
Last Tuesday, I popped over to my neighbor’s place just to borrow a cup of sugar, but before I even stepped inside, the warm, comforting scent of honey and toasted oats stopped me cold in my tracks. She wasn’t making a big deal out of it—just casually stirring a bowl on the counter like it was the easiest thing in the world. Honestly, I was a little envious of how effortlessly those easy no-bake homemade granola bars with honey & oats came together. No oven, no fuss, just simple ingredients melding into something that looked and smelled extraordinary.
She laughed when I asked for the recipe, saying it’s her go-to snack that never fails her during busy days or quick hikes. You know that feeling when a recipe sneaks up on you, becoming one of those staples you turn to again and again? That’s what happened here. The bars were chewy but with just the right crunch, subtly sweetened with honey, and packed with wholesome oats that felt like a hug in every bite. I made a bit of a mess trying to replicate it that evening (spilled honey, of course), but the bars turned out just as good, and I’ve been hooked ever since.
Maybe you’re looking for a quick, healthy snack that doesn’t require a ton of time or fancy gadgets. Maybe you’ve been there—scrambling for something homemade but easy enough to throw together without stress. Whatever your reason, this recipe for easy no-bake homemade granola bars with honey & oats is exactly that kind of recipe. It’s the kind of thing you’ll find yourself making on a lazy afternoon, totally relaxed, with zero pressure, and ending up with something delicious that feels like a little treat for yourself.
Why You’ll Love This Recipe
After testing this recipe several times (and sharing with family and friends), I can confidently say it’s one of the simplest and most satisfying snacks you can make at home. Here’s why it stands out:
- Quick & Easy: Comes together in under 20 minutes, perfect for busy weeknights or last-minute cravings.
- Simple Ingredients: No fancy grocery trips needed; you likely already have oats, honey, and nuts in your pantry.
- Perfect for On-the-Go: These bars are great for packing in lunchboxes, taking to the gym, or grabbing during a busy workday.
- Crowd-Pleaser: Loved by kids and adults alike, they balance sweet and nutty flavors without being overly sugary.
- Unbelievably Delicious: The chewy texture combined with a hint of honey sweetness makes these bars feel like a treat and not just a snack.
What really makes this recipe different? It’s the no-bake method paired with a perfectly balanced mix of ingredients that keeps the bars stable yet soft. I’ve tried other granola bars that are either too hard or crumbly, but this one hits that sweet spot every time. Plus, the honey acts as a natural binder, giving a subtle floral note that you just don’t get with processed sweeteners.
Honestly, it’s not just a snack; it’s a little moment of comfort and energy wrapped up in a bar. Whether you’re impressing guests without breaking a sweat or just treating yourself on a hectic day, these granola bars deliver that quietly satisfying feeling you didn’t know you needed.
What Ingredients You Will Need
This recipe uses simple, wholesome ingredients to deliver bold flavor and satisfying texture without the fuss. Most are pantry staples, and you can easily swap a few depending on what you have on hand.
- Old-fashioned rolled oats (2 cups / 180g) – The heart of the granola bars; I recommend Bob’s Red Mill for the best texture.
- Honey (½ cup / 170g) – Acts as a natural sweetener and binder; raw honey adds a lovely depth of flavor.
- Natural peanut butter (⅓ cup / 80g) – Adds creaminess and protein; feel free to substitute almond or sunflower seed butter.
- Chopped nuts (½ cup / 60g) – I usually use a mix of almonds and walnuts for crunch, but pecans or cashews work great too.
- Vanilla extract (1 tsp) – For a subtle warm aroma.
- Ground cinnamon (½ tsp) – Optional, but it adds a cozy hint that pairs perfectly with the honey.
- Salt (a pinch) – Balances the sweetness and rounds out the flavors.
- Mini chocolate chips or dried fruit (optional, ½ cup / 85g) – For extra bursts of flavor, try dried cranberries, raisins, or dark chocolate chips.
If you’re aiming for a gluten-free version, double-check that your oats are certified gluten-free. Also, if you want to keep it vegan, swap the honey with maple syrup but note that the texture might be a little softer.
Equipment Needed
Since this is a no-bake recipe, the equipment list is refreshingly short and straightforward:
- Mixing bowl: A large bowl to combine all your ingredients comfortably. I like using glass or stainless steel because they’re easy to clean.
- Spoon or spatula: For stirring. A sturdy silicone spatula works best for scraping sides.
- 8×8 inch baking pan or similar: For pressing the mixture into shape. If you don’t have an 8×8, a loaf pan works too.
- Parchment paper: To line the pan, making it easier to lift out the bars once set.
- Measuring cups and spoons: For accuracy—you know, so the bars don’t turn out too sticky or crumbly.
For budget-friendly options, an old cake pan or even a shallow dish can double as your pressing surface. Just remember to line it well. Personally, I’ve found that using parchment paper is a little messy but well worth it for the clean release of the bars.
Preparation Method
- Prepare your pan: Line an 8×8 inch (20×20 cm) baking pan with parchment paper, leaving some overhang on the sides for easy removal. This step takes about 2 minutes but makes cleanup a breeze.
- Mix the dry ingredients: In a large bowl, combine 2 cups (180g) of rolled oats, ½ cup (60g) chopped nuts, ½ tsp ground cinnamon, and a pinch of salt. Stir them well so the spices and salt distribute evenly. This should take about 3 minutes.
- Combine wet ingredients: In a small saucepan over low heat, gently warm ½ cup (170g) honey and ⅓ cup (80g) natural peanut butter until smooth and glossy, about 3-4 minutes. Stir frequently to prevent burning. Remove from heat and add 1 tsp vanilla extract.
- Mix wet and dry: Pour the warm honey and peanut butter mixture over the dry ingredients. Use a spatula to combine everything thoroughly. The oats and nuts should be evenly coated. This part can be sticky, so don’t be shy about getting your hands in there if needed!
- Add optional ingredients: If you want to include mini chocolate chips or dried fruit (½ cup / 85g), fold them in now. Be gentle to avoid breaking the pieces.
- Press into pan: Transfer the mixture into the lined pan and press down firmly using the back of a spatula or your hands (clean, of course). The firmer you press, the better the bars will hold together. Take about 5 minutes here to get it compacted.
- Chill and set: Place the pan in the refrigerator for at least 2 hours to let the bars firm up. If you’re impatient like me, 90 minutes might work but they’ll be softer.
- Cut into bars: Once set, lift the granola block out using the parchment paper overhang and place it on a cutting board. Use a sharp knife to cut into 8 or 10 bars, depending on your preferred size.
Pro tip: If your knife sticks, wipe it with a damp cloth between cuts for clean edges. If the bars crumble too much, next time press a bit firmer and chill longer. You’ll get the hang of the texture after a couple of tries.
Cooking Tips & Techniques
Making no-bake granola bars sounds simple, but a few tricks can make your bars truly shine.
- Warm your honey and nut butter gently: Heating them just enough to combine smoothly helps the mixture bind well. Overheating can make the honey too runny and hard to set.
- Press firmly: Don’t be shy when pressing the mixture into the pan. This is key to bars that hold together instead of crumbling apart.
- Choose your oats wisely: Old-fashioned rolled oats work best here. Instant oats can get mushy, and steel-cut oats won’t absorb the binder properly.
- Don’t skip chilling: The fridge gives the bars time to set and hold their shape. I’ve tried leaving them at room temp, and they just fall apart.
- Experiment with mix-ins: Nuts, seeds, dried fruit, or even a sprinkle of unsweetened coconut can add delightful texture and flavor variety.
One time, I forgot to line the pan with parchment, and let me tell you, wresting the sticky mass out was a nightmare. Lesson learned, parchment is your best friend here.
Variations & Adaptations
This base recipe is super forgiving; you can tailor it to your taste or dietary needs with ease.
- Gluten-free option: Use certified gluten-free oats and swap nut butter for a seed butter like sunflower for nut allergies.
- Vegan version: Replace honey with pure maple syrup or agave nectar. Keep in mind the texture might be a tad softer.
- Flavor twists: Add cocoa powder for chocolate lovers, or swap cinnamon for pumpkin pie spice in the fall. A handful of chia seeds or flaxseeds boosts nutrition, too.
- Different binders: If you’re avoiding nut butters, mashed ripe bananas can work, though the bars will be softer and sweeter.
Personally, I once tried roasting the oats and nuts beforehand to bring out more toasty notes. It gave the bars a deeper flavor but also made them a bit crunchier, which some folks loved. Feel free to adjust based on your texture preference!
Serving & Storage Suggestions
These granola bars are best enjoyed chilled or at room temperature. They make a perfect morning snack with a cup of coffee or an afternoon pick-me-up alongside herbal tea.
Pair them with fresh fruit or a dollop of yogurt for a more substantial bite. I often bring them on hikes, and they pair wonderfully with natural spring water or a refreshing iced tea.
For storage, wrap bars individually in parchment paper or store in an airtight container. Keep them in the refrigerator for up to 2 weeks. They freeze beautifully, too—just thaw at room temperature before eating.
Reheating isn’t necessary, but if you prefer a slightly softer bar, pop one in the microwave for 10 seconds. Just don’t overdo it or the honey might get runny.
Over time, the flavors meld and get even better, so making a batch ahead for the week is a smart move!
Nutritional Information & Benefits
Each bar (assuming 8 bars per batch) provides approximately:
| Calories | 180-200 kcal |
|---|---|
| Protein | 5-6 grams |
| Fat | 8-10 grams (mostly healthy fats from nuts and nut butter) |
| Carbohydrates | 22-25 grams |
| Fiber | 3-4 grams |
The oats provide sustained energy and fiber, while the nuts and peanut butter give you healthy fats and protein to keep hunger at bay. Honey is a natural sweetener with antioxidants, making these bars a healthier alternative to many store-bought snacks loaded with refined sugars.
Just a heads up: these bars contain nuts and honey, so they’re not suitable for those with nut allergies or infants under one year old. For a nut-free option, try sunflower seed butter and omit nuts.
From a wellness perspective, these bars strike a nice balance of nutrition and flavor. I find them great for keeping energy steady during long days without that sugar crash.
Conclusion
These easy no-bake homemade granola bars with honey & oats are the kind of recipe that sneak into your routine and never leave. They’re simple to make, require no oven time, and deliver that perfect blend of chewy, crunchy, and sweet that’s hard to beat. Whether you’re new to making snacks from scratch or a seasoned kitchen adventurer, this recipe adapts well and rewards you with consistently tasty results.
Feel free to customize with your favorite nuts, seeds, or dried fruits to make it truly your own. Honestly, I keep coming back to this recipe because it’s reliable, wholesome, and just downright satisfying.
If you try making these bars, I’d love to hear how they turn out or what variations you come up with! Leave a comment or share your favorite tweaks—let’s swap stories and snack ideas. Remember, great snacks don’t have to be complicated, and these bars prove just that.
Happy snacking!
FAQs
Can I use quick oats instead of rolled oats?
Quick oats tend to make the bars mushier and less chewy, so I recommend sticking with old-fashioned rolled oats for the best texture.
How long do these granola bars last?
Stored in an airtight container in the fridge, they last up to 2 weeks. You can also freeze them for up to 3 months.
Can I make these bars nut-free?
Yes! Substitute nut butter with sunflower seed butter and omit the chopped nuts. They’ll still hold together nicely.
Do I have to refrigerate the bars?
Refrigeration helps the bars set and keeps them firm. At room temperature, they might be softer and more prone to crumbling.
Can I add protein powder to this recipe?
Absolutely! Adding a scoop of your favorite protein powder can boost nutrition. Just adjust the wet ingredients slightly if the mixture becomes too dry.
Pin This Recipe!
Easy No-Bake Homemade Granola Bars Recipe for Healthy Snacks
These easy no-bake homemade granola bars combine honey and oats for a chewy, crunchy, and subtly sweet snack that’s perfect for busy days or hikes. Made with simple ingredients and no oven required, they are a wholesome treat you can enjoy anytime.
- Prep Time: 10 minutes
- Cook Time: 5 minutes
- Total Time: 2 hours 15 minutes
- Yield: 8 bars 1x
- Category: Snack
- Cuisine: American
Ingredients
- 2 cups old-fashioned rolled oats (180g)
- ½ cup honey (170g)
- ⅓ cup natural peanut butter (80g)
- ½ cup chopped nuts (60g) (almonds and walnuts recommended)
- 1 tsp vanilla extract
- ½ tsp ground cinnamon (optional)
- Pinch of salt
- ½ cup mini chocolate chips or dried fruit (85g) (optional)
Instructions
- Line an 8×8 inch (20×20 cm) baking pan with parchment paper, leaving some overhang on the sides for easy removal.
- In a large bowl, combine 2 cups (180g) rolled oats, ½ cup (60g) chopped nuts, ½ tsp ground cinnamon, and a pinch of salt. Stir well to distribute evenly.
- In a small saucepan over low heat, gently warm ½ cup (170g) honey and ⅓ cup (80g) natural peanut butter until smooth and glossy, about 3-4 minutes, stirring frequently. Remove from heat and add 1 tsp vanilla extract.
- Pour the warm honey and peanut butter mixture over the dry ingredients and mix thoroughly until oats and nuts are evenly coated.
- Fold in optional mini chocolate chips or dried fruit (½ cup / 85g) if using, being gentle to avoid breaking pieces.
- Transfer the mixture into the lined pan and press down firmly using the back of a spatula or clean hands to compact the mixture.
- Place the pan in the refrigerator for at least 2 hours to let the bars firm up.
- Once set, lift the granola block out using the parchment paper overhang and cut into 8 or 10 bars with a sharp knife.
Notes
Warm honey and peanut butter gently to ensure smooth binding. Press the mixture firmly into the pan to prevent crumbling. Use old-fashioned rolled oats for best texture. Chill bars for at least 2 hours for firm set. For vegan version, substitute honey with maple syrup but expect softer texture. Nut-free option available by using sunflower seed butter and omitting nuts.
Nutrition
- Serving Size: 1 bar (if 8 bars per
- Calories: 190
- Sugar: 12
- Sodium: 50
- Fat: 9
- Saturated Fat: 1
- Carbohydrates: 24
- Fiber: 3.5
- Protein: 5.5
Keywords: no-bake granola bars, homemade granola bars, healthy snacks, honey oats bars, easy granola bars, peanut butter granola bars, quick snacks


