Love this? Save it for later!
Share the inspiration with your friends
Introduction
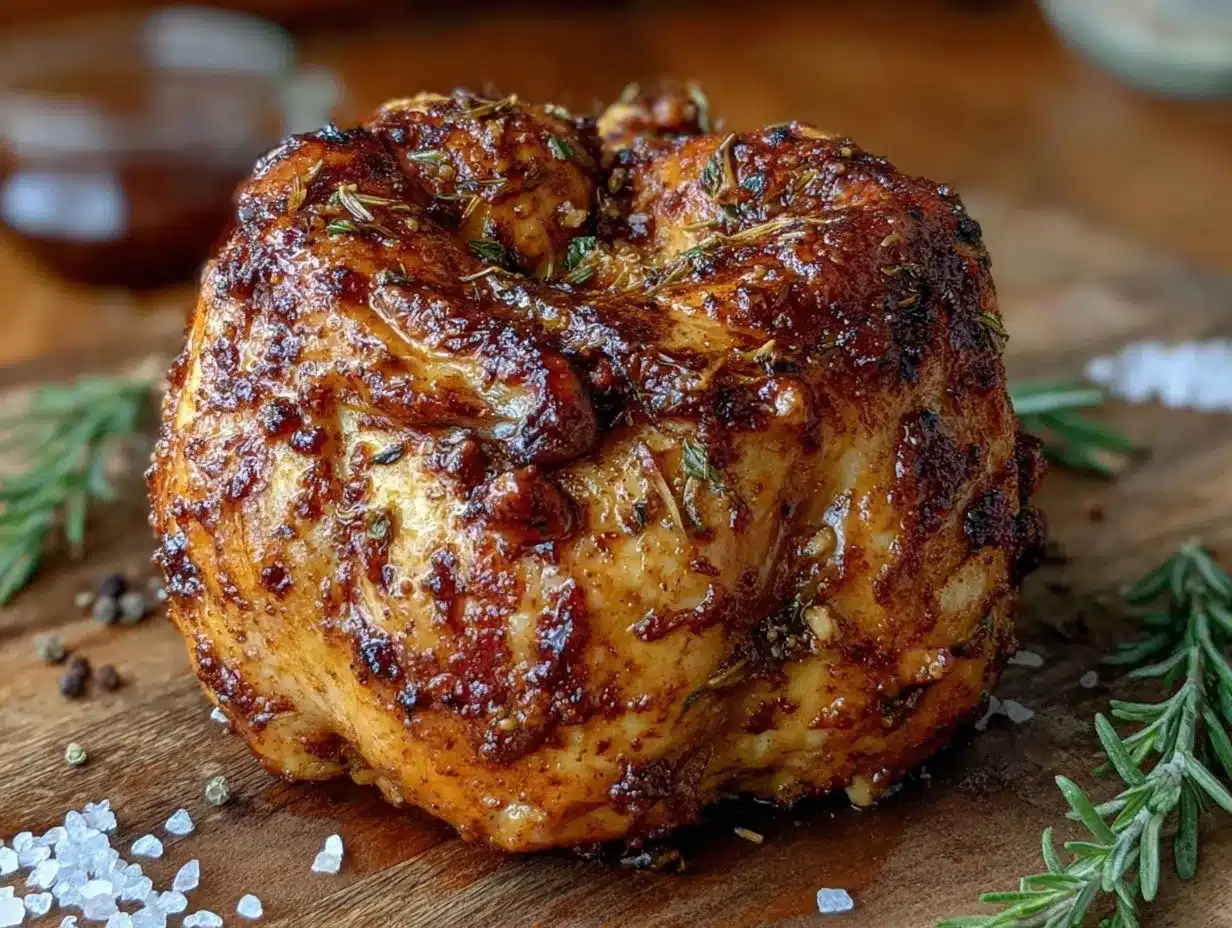
There used to be a cozy backyard BBQ joint tucked behind a bustling street market in Austin that made the most unforgettable crispy beer can chicken. When they shuttered their doors unexpectedly one late summer, I was gutted. Honestly, it felt like losing a secret treasure. I mean, that chicken had this crackling, golden skin that shattered with every bite, and the spices? Totally unforgettable. After about a dozen attempts—some downright smoky disasters and others just okay—I finally nailed the crispy beer can chicken with flavorful dry rub spices that tasted just like that beloved place. It wasn’t easy; one time I forgot to drain the beer can, and the kitchen turned into a mini brewery experiment. Maybe you’ve been there—the kind of recipe that sticks with you, haunting your dinner dreams until you get it right. I keep making this recipe because it’s not just about cooking chicken; it’s about capturing that perfect crispy skin and the dance of spices that make your taste buds sit up and say, “Yes, please!” Let me tell you, this recipe has become my go-to when I want that smoky, juicy chicken experience that’s finger-lickin’ good every single time.
Why You’ll Love This Recipe
After all the trial and error, here’s why this crispy beer can chicken recipe with flavorful dry rub spices stands out:
- Quick & Easy: Once your dry rub is ready, the prep takes only about 15 minutes. The chicken cooks hands-off while you relax or prep sides.
- Simple Ingredients: All pantry staples—no need to hunt for exotic herbs or spices. The dry rub blends common spices into something extraordinary.
- Perfect for Outdoor Cooking: Whether it’s a weekend grill session or a casual potluck, this chicken steals the show every time.
- Crowd-Pleaser: Kids, adults, picky eaters—everyone loves that crispy, juicy bite with a little smoky edge.
- Unbelievably Delicious: The dry rub balances smoky, sweet, and spicy notes, while the beer can technique locks in moisture and crisps the skin beautifully.
This recipe isn’t just another roast chicken. It’s the one where the dry rub spices are thoughtfully layered, creating a crust that sings with flavor. Plus, the beer can method is a game-changer for juicy meat and a crackling finish. Honestly, I love how it turns a simple bird into something festive yet totally doable on a weeknight. If you want a recipe that makes you close your eyes and savor the moment, this is it.
What Ingredients You Will Need
This recipe uses straightforward ingredients that come together to create bold flavor and that perfect crispy skin. Most of these you probably already have, and substitutions are easy if needed.
- Whole chicken (about 4-5 lbs / 1.8-2.3 kg): Fresh or thawed, preferably organic or free-range for the best taste.
- Beer (1 can, 12 oz / 355 ml): Use a light lager or pilsner—nothing too bitter. I personally prefer Modelo or Stella Artois for their mild flavor.
- Olive oil (2 tbsp / 30 ml): For helping the dry rub adhere and adding richness.
- Brown sugar (2 tbsp / 25 g): Adds a subtle sweetness and helps with caramelization.
- Paprika (2 tbsp / 14 g): Smoked paprika is ideal—gives depth and a smoky aroma.
- Garlic powder (1 tbsp / 8 g): For that savory punch.
- Onion powder (1 tbsp / 8 g): Adds a mild sweetness and complexity.
- Ground black pepper (1 tsp / 2 g): Freshly ground recommended for brightness.
- Cayenne pepper (1 tsp / 2 g): Optional, for a gentle heat kick.
- Salt (2 tsp / 12 g): Use kosher salt or sea salt for best flavor distribution.
- Dried thyme (1 tsp / 1 g): Brings a subtle herbal note.
- Dried oregano (1 tsp / 1 g): Complements the thyme and rounds out the rub.
Substitution tip: If you’re gluten-sensitive, double-check your beer or swap it for sparkling water with a splash of apple cider vinegar. For dairy-free, this recipe is naturally free of dairy.
Equipment Needed
- Grill or oven with roasting capabilities: A charcoal or gas grill works perfectly; an oven can do the trick if you don’t have a grill.
- Beer can chicken holder or stand: Not mandatory but helps keep the chicken upright and stable during cooking.
- Meat thermometer: Essential for checking the internal temperature to avoid overcooking.
- Basting brush: Useful for applying olive oil and the dry rub evenly.
- Mixing bowl: For combining the dry rub spices.
- Kitchen tongs: Helpful for handling the hot chicken safely.
If you don’t have a beer can chicken holder, you can use a sturdy oven-safe can with a folded piece of foil underneath to stabilize. I once used a makeshift stand from foil and a baking tray, and it worked surprisingly well! For budget-friendly grilling, a simple wire rack over a drip pan will do, just make sure the chicken stands upright.
Preparation Method
- Prepare the chicken: Remove any giblets from the cavity. Pat the chicken dry with paper towels—this helps the skin crisp up nicely. (About 5 minutes)
- Make the dry rub: In a bowl, combine brown sugar, smoked paprika, garlic powder, onion powder, black pepper, cayenne (if using), salt, thyme, and oregano. Mix well to blend the flavors evenly. (5 minutes)
- Apply olive oil: Rub the olive oil all over the chicken, inside and out. This locks in moisture and helps the dry rub stick. (2 minutes)
- Coat the chicken: Generously sprinkle the dry rub onto the chicken, patting it in so it adheres well. Make sure to cover under the wings and inside the cavity for full flavor. (5 minutes)
- Prepare the beer can: Open your beer and pour out (or drink!) about half the can. This prevents overflow during cooking. (2 minutes)
- Set the chicken on the beer can: Carefully slide the chicken cavity onto the beer can, making sure it sits upright and stable on a roasting pan or grill rack. (3 minutes)
- Preheat your grill or oven: For the grill, set up indirect heat at around 375°F (190°C). For the oven, preheat to the same temperature. (10 minutes)
- Cook the chicken: Place the chicken upright on the grill or in the oven. Close the lid or door and roast for about 1 hour 15 minutes to 1 hour 30 minutes, until the internal temperature reaches 165°F (74°C) at the thickest part of the thigh. (Check after 1 hour 10 minutes to avoid overcooking.)
- Check for doneness: Use a meat thermometer to ensure the chicken is fully cooked. Juices should run clear, and the skin should be deep golden and crispy. (Ongoing, last 10 minutes)
- Rest the chicken: Carefully remove the chicken from the beer can and let it rest for 10-15 minutes before carving. This helps juices redistribute. (15 minutes)
Pro tip: Keep a spray bottle of water handy to manage flare-ups on the grill. Also, if the skin starts browning too fast, tent loosely with foil.
Cooking Tips & Techniques
There’s a bit of finesse to getting that perfect crispy beer can chicken, so here are some tips I’ve learned the hard way:
- Dry the skin thoroughly: Moisture is the enemy of crispiness. Pat the chicken skin dry several times before applying oil and rub.
- Don’t skip the beer can prep: Pouring out half the beer prevents bubbling over and keeps the chicken steady.
- Maintain indirect heat: Direct flames can char the skin before the inside cooks. Setting up indirect heat avoids that.
- Rotate if needed: If your grill has hot spots, gently turn the chicken halfway through cooking for even browning.
- Use a thermometer: Guessing doneness is risky. I’ve ruined too many batches by cutting early. 165°F (74°C) is your safe target.
- Rest before slicing: Don’t rush this step. Resting lets the juices settle, making your chicken juicy and tender.
One time, I left the chicken on the grill too long and ended up with a tough bird. Lesson learned: patience is key!
Variations & Adaptations
- Spicy Kick: Add extra cayenne or chili powder to the dry rub for those who love heat.
- Herb-Infused: Replace dried oregano and thyme with fresh rosemary and sage for a fragrant twist.
- Gluten-Free: This recipe is naturally gluten-free, but double-check your beer choice to avoid hidden gluten.
- Oven-Only Version: If you don’t have a grill, roast the chicken upright on a sturdy oven-safe can or use a vertical roaster pan at 375°F (190°C) until done.
- Beer Swap: Use a non-alcoholic beer or sparkling apple cider for a family-friendly version that still keeps the moisture locked in.
Personally, I’ve tried a maple-smoked paprika rub once, and it gave the chicken a sweet-smoky vibe that surprised everyone at the table.
Serving & Storage Suggestions
Serve your crispy beer can chicken warm, straight off the grill or oven for the best texture. I like to carve it into generous pieces and serve with grilled vegetables or a fresh green salad to balance the richness.
It pairs wonderfully with a chilled pale ale or a crisp white wine, but honestly, a homemade iced tea never goes wrong either.
Leftovers can be stored in an airtight container in the fridge for up to 3 days. To reheat, pop pieces in a 350°F (175°C) oven for about 10-15 minutes to bring back some crispness. Avoid microwaving, which tends to soften the skin.
Flavors tend to deepen after a day, so if you can wait, leftovers taste even better the next day!
Nutritional Information & Benefits
One serving of this crispy beer can chicken (about 6 oz / 170 g) contains approximately:
| Calories | 350 kcal |
|---|---|
| Protein | 40 g |
| Fat | 18 g |
| Carbohydrates | 2 g |
This recipe is high in protein and moderate in healthy fats thanks to the olive oil. The dry rub spices bring antioxidants and anti-inflammatory benefits, especially from paprika and garlic. Using lean chicken and grilling helps keep this dish relatively low in calories compared to fried options.
It’s also naturally gluten-free and dairy-free, making it suitable for many dietary needs.
Conclusion
This crispy beer can chicken with flavorful dry rub spices is truly one of those recipes that turns ordinary chicken into a star of any meal. Its irresistible crispy skin and juicy meat come together with an easy-to-make spice blend that you can tweak to your liking. I love how it brings a touch of celebration to casual days and feels like a culinary win every time I make it.
Give it a try, and don’t be afraid to adjust the dry rub or beer to match your taste. I’d love to hear how your version turns out or any creative twists you add—drop a comment below and share your experience!
Happy cooking, and may your chicken always come out crispy and delicious!
FAQs
What type of beer is best for beer can chicken?
Light lagers or pilsners work best because they offer mild flavor without overpowering the chicken. Avoid very hoppy or dark beers that can add bitterness.
Can I make this recipe without a grill?
Absolutely! You can roast the chicken upright in your oven using a vertical roaster or a sturdy oven-safe can at 375°F (190°C) until cooked through.
How do I know when the chicken is fully cooked?
Use a meat thermometer inserted into the thickest part of the thigh. It should read 165°F (74°C) to be safe and juicy.
Is it necessary to pour out half the beer before cooking?
Yes, pouring out about half the beer prevents overflow and helps the chicken sit steadily on the can during cooking.
Can I prepare the dry rub in advance?
Definitely! The dry rub can be mixed and stored in an airtight container for up to a month, making weeknight grilling even simpler.
Pin This Recipe!
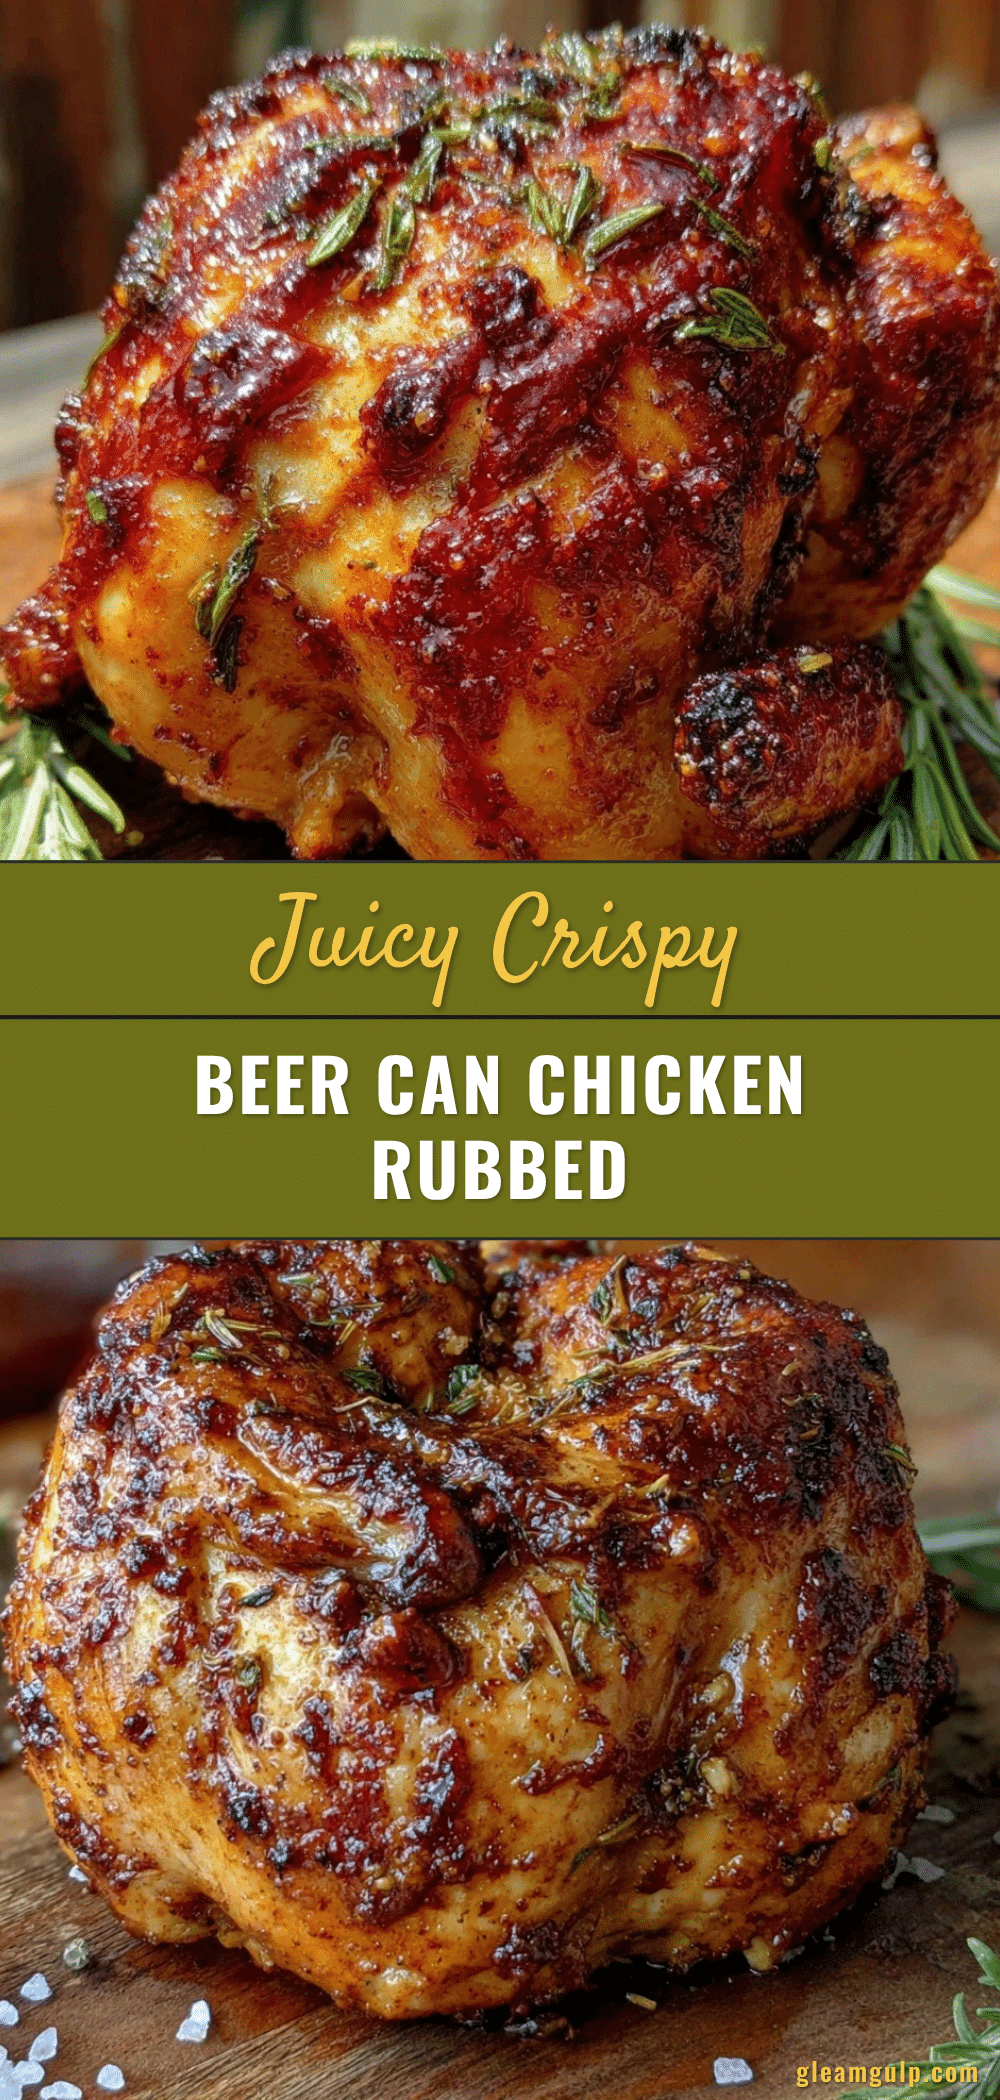
Crispy Beer Can Chicken Recipe with Easy Flavorful Dry Rub Spices
This recipe delivers a crispy, juicy beer can chicken with a flavorful dry rub that locks in moisture and creates a crackling golden skin. Perfect for backyard BBQs or oven roasting, it combines simple pantry spices for an unforgettable taste.
- Prep Time: 15 minutes
- Cook Time: 1 hour 30 minutes
- Total Time: 1 hour 45 minutes
- Yield: 6 servings
- Category: Main Course
- Cuisine: American
Ingredients
- Whole chicken (about 4-5 lbs / 1.8-2.3 kg)
- Beer (1 can, 12 oz / 355 ml) – light lager or pilsner
- Olive oil (2 tbsp / 30 ml)
- Brown sugar (2 tbsp / 25 g)
- Paprika (2 tbsp / 14 g) – smoked paprika preferred
- Garlic powder (1 tbsp / 8 g)
- Onion powder (1 tbsp / 8 g)
- Ground black pepper (1 tsp / 2 g)
- Cayenne pepper (1 tsp / 2 g) – optional
- Salt (2 tsp / 12 g) – kosher or sea salt
- Dried thyme (1 tsp / 1 g)
- Dried oregano (1 tsp / 1 g)
Instructions
- Remove any giblets from the chicken cavity and pat the chicken dry with paper towels (about 5 minutes).
- In a mixing bowl, combine brown sugar, smoked paprika, garlic powder, onion powder, black pepper, cayenne pepper (if using), salt, thyme, and oregano. Mix well (5 minutes).
- Rub olive oil all over the chicken, inside and out (2 minutes).
- Generously sprinkle the dry rub onto the chicken, patting it in to adhere well, including under the wings and inside the cavity (5 minutes).
- Open the beer can and pour out or drink about half to prevent overflow during cooking (2 minutes).
- Carefully slide the chicken cavity onto the beer can, ensuring it sits upright and stable on a roasting pan or grill rack (3 minutes).
- Preheat grill or oven to 375°F (190°C) using indirect heat (10 minutes).
- Place the chicken upright on the grill or in the oven. Roast for 1 hour 15 minutes to 1 hour 30 minutes until the internal temperature reaches 165°F (74°C) at the thickest part of the thigh. Check after 1 hour 10 minutes to avoid overcooking.
- Use a meat thermometer to ensure doneness; juices should run clear and skin should be deep golden and crispy (last 10 minutes).
- Remove the chicken from the beer can and let it rest for 10-15 minutes before carving to allow juices to redistribute (15 minutes).
Notes
Pouring out half the beer prevents bubbling over and keeps the chicken steady. Use indirect heat to avoid charring. Rest the chicken before slicing to keep it juicy. Keep a spray bottle of water handy for flare-ups on the grill. Tent with foil if skin browns too fast. Dry the skin thoroughly before applying rub for best crispiness.
Nutrition
- Serving Size: About 6 oz (170 g) c
- Calories: 350
- Fat: 18
- Carbohydrates: 2
- Protein: 40
Keywords: beer can chicken, crispy chicken, dry rub, BBQ chicken, grilled chicken, smoked paprika, backyard BBQ, easy chicken recipe


