Love this? Save it for later!
Share the inspiration with your friends
Introduction
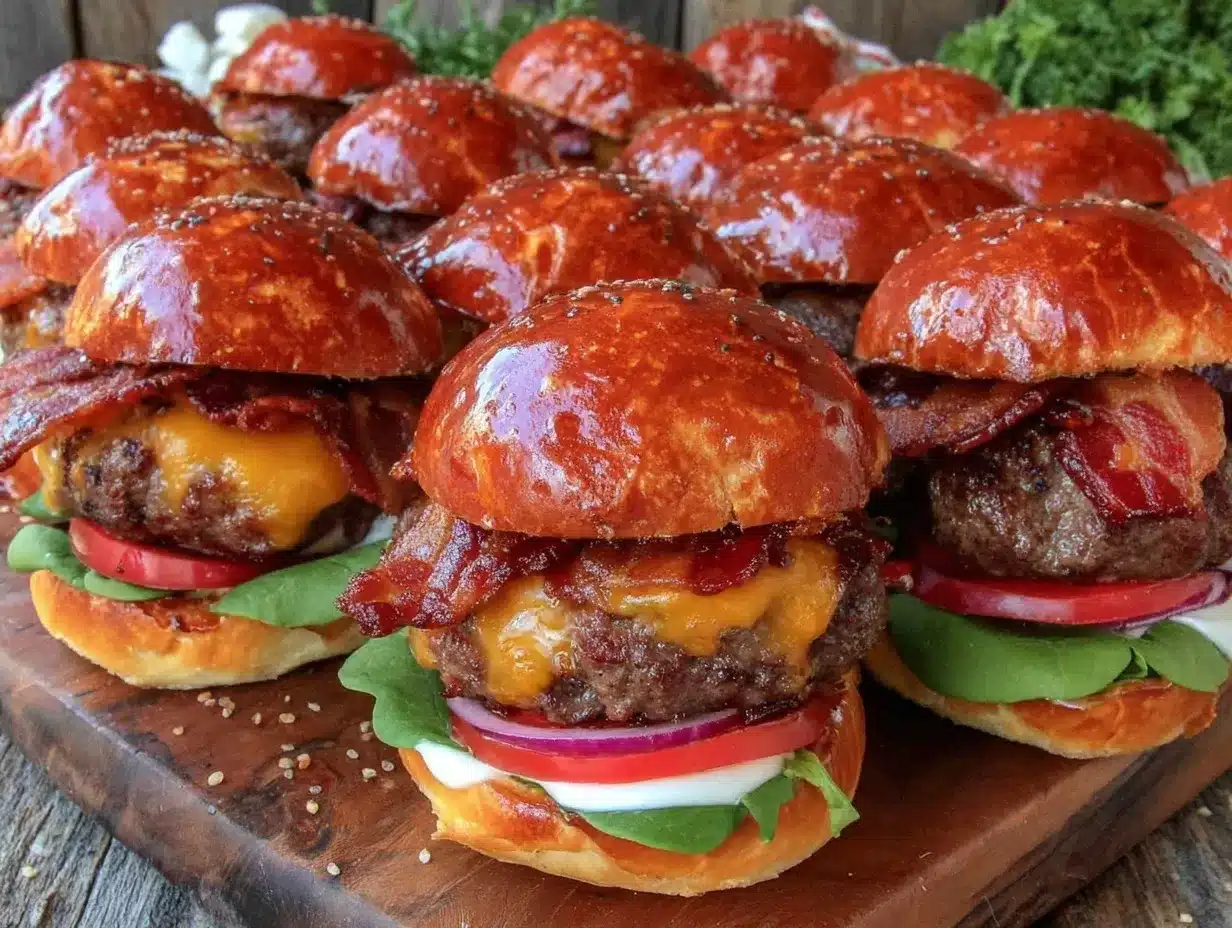
“I wasn’t expecting much when I stopped by to borrow a cup of sugar last Saturday afternoon, but the moment I stepped through the door, that unmistakable scent of smoky bacon and melted cheese hit me — right from the hallway,” I remember thinking. Jess wasn’t making a fuss or rolling out the red carpet; she was just throwing together snacks for her kids’ impromptu playdate. Honestly, the way she tossed those sliders on the griddle like it was no big deal made me a little jealous. You know that feeling when something simple smells so incredible that you just can’t wait to taste it? That’s exactly how these Savory Ultimate Bacon Cheeseburger Sliders grabbed me.
Jess’s kitchen was a bit chaotic that day — a cracked mixing bowl here, a spilled bag of slider buns there, and little interruptions from her youngest who insisted on “helping.” Yet, despite the casual madness, those little sliders came together with such ease and flavor that I had to get the recipe. I mean, who wouldn’t want perfect party bites that taste like a full-on bacon cheeseburger but fit in the palm of your hand?
Since then, these sliders have been my go-to for everything from weekend hangouts to game nights. Maybe you’ve been there too, hunting for that no-stress snack that impresses without the fuss. Let me tell you, this recipe stayed with me because it’s exactly that—the kind of effortless, crowd-pleasing magic that feels like a treat but doesn’t require hours in the kitchen.
Why You’ll Love This Recipe
After testing these sliders multiple times (and yes, sampling enough to call myself a bona fide expert), I can say with confidence this recipe hits all the marks. Here’s why you’ll want to keep it on speed dial:
- Quick & Easy: Ready in under 30 minutes, making it perfect for busy weeknights or last-minute get-togethers.
- Simple Ingredients: No need for specialty stores—most of these come straight from your pantry or fridge.
- Perfect for Parties: These sliders are bite-sized and mess-free, ideal for casual gatherings, game days, or even potlucks.
- Crowd-Pleaser: Kids and adults alike can’t get enough of the smoky bacon and gooey cheese combo.
- Unbelievably Delicious: The balance of juicy beef, crispy bacon, and melted cheddar creates a flavor bomb that’s as comforting as it is satisfying.
What sets these sliders apart? Jess swears by mixing a pinch of smoked paprika into the patties and layering the cheese on just before the last minute of cooking so it melts perfectly but doesn’t run off. Plus, using soft, slightly sweet slider buns gives it that nostalgic diner vibe without overpowering the savory filling. It’s not just another cheeseburger slider recipe—it’s the ultimate version you’ll keep coming back to, whether you’re feeding a crowd or just craving something special.
Honestly, the first time I took a bite, it was like a little warm hug on a plate. That’s the kind of recipe that makes you close your eyes after the first bite and smile. It’s comfort food done right, without the stress or mess.
What Ingredients You Will Need
This recipe uses straightforward, satisfying ingredients that come together for maximum flavor and texture without complication. You’ll find most of these are pantry staples or easy to grab at any grocery store.
- For the Sliders:
- Ground beef (80/20 blend, 1 lb / 450 g) – for juicy, flavorful patties
- Smoked bacon strips (6-8 slices) – crisped and chopped for that smoky crunch
- Sharp cheddar cheese (6 slices) – melts beautifully and packs a tangy punch
- Slider buns (12 small, soft buns) – I recommend King’s Hawaiian for a slightly sweet contrast
- Yellow mustard (2 tbsp) – classic tang
- Ketchup (2 tbsp) – balances the savoriness
- Dill pickles (thinly sliced, 1/2 cup) – for that essential acidic bite
- Butter (2 tbsp, melted) – to brush the buns for golden toasting
- Seasonings & Extras:
- Salt (1 tsp) and freshly ground black pepper (1/2 tsp) – simple but crucial for seasoning
- Smoked paprika (1/2 tsp) – Jess’s secret for that subtle smoky depth
- Garlic powder (1/4 tsp) – adds a hint of warmth
Substitution tips: If you prefer a healthier twist, swap ground beef for ground turkey or chicken. For a gluten-free option, use gluten-free slider buns or lettuce wraps. If you’re avoiding dairy, cheddar can be replaced with a melty vegan cheese alternative. When it comes to bacon, thick-cut adds more crunch but regular thin slices work fine too.
Equipment Needed
To make these bacon cheeseburger sliders, you don’t need anything fancy — just reliable basics that you probably already own.
- Large skillet or griddle: I use my cast iron skillet for even heat and that nice sear, but a nonstick pan works well too.
- Baking sheet: For assembling and warming the sliders in the oven.
- Small bowl: To mix seasonings into the ground beef.
- Tongs or spatula: For flipping patties and handling bacon.
- Pastry brush (optional): For brushing melted butter onto buns — you can use a spoon if you don’t have one.
- Sharp knife: To slice pickles and buns cleanly.
If you don’t have a cast iron skillet, no worries — just make sure your pan heats evenly to get that nice crust on the patties. And if you want to keep things budget-friendly, a good heavy-bottomed sauté pan will do the trick just fine.
Preparation Method
- Preheat and prep: Set your oven to 350°F (175°C). Line a baking sheet with parchment paper or foil for easy cleanup. Get your skillet heating on medium-high.
- Cook the bacon: Lay bacon strips in the hot skillet and cook until crispy, about 6-8 minutes, flipping halfway. Remove and drain on paper towels. Once cooled, chop into bite-sized pieces.
- Mix the beef: In a bowl, combine ground beef with salt, pepper, smoked paprika, and garlic powder. Mix gently with your hands or a spoon—don’t overwork it or sliders get tough.
- Form patties: Divide the beef into 12 equal portions (about 1.3 oz / 38 g each). Roll gently into balls and flatten just slightly—they should be about the size of your slider buns. Make a small indentation in the center of each patty with your thumb to prevent puffing up.
- Cook patties: Place patties in the skillet without crowding. Cook about 3 minutes per side for medium, adjusting time if you like them more or less done. One minute before done, lay a slice of cheddar on each patty to melt.
- Toast the buns: While patties cook, brush the cut sides of slider buns with melted butter. Place them on the baking sheet, buttered side up, and toast in the oven for 5-7 minutes until golden.
- Assemble sliders: Spread a thin layer of mustard on the bottom bun, add the cheesy patty, top with crispy bacon and pickle slices, then a small drizzle of ketchup. Cap with the top bun.
- Warm sliders: Put assembled sliders back on the baking sheet and warm in the oven for 3-5 minutes so flavors meld and cheese stays gooey.
- Serve & enjoy: Arrange sliders on a platter and watch them disappear fast.
Pro tip: If you notice patties shrinking too much, remember to handle the meat gently and not pack it too tight. Also, the thumb indentation trick really helps keep the sliders flat and easy to stack.
Cooking Tips & Techniques
Making sliders might seem simple, but a few insider tips make all the difference:
- Don’t overwork the meat: Mixing ground beef too much tightens the texture. Use a light touch when seasoning and shaping patties.
- Get the skillet hot: A properly heated pan sears the patties, locking in juices and creating that crave-worthy crust.
- Cook bacon first: This lets you use the rendered bacon fat to add flavor when cooking patties if you want to—just drain excess so sliders don’t get greasy.
- Layer cheese at the right time: Add cheese just before finishing cooking so it melts perfectly without turning oily or rubbery.
- Toast buns properly: Brushing buns with butter and toasting adds crunch and flavor, preventing soggy bottoms.
- Multitask smartly: While patties cook, prep toppings so assembly goes quickly. That way, sliders are hot and fresh when served.
- Customize seasoning: Feel free to tweak with a pinch of cayenne for heat or swap smoked paprika for regular if you prefer milder flavor.
Honestly, I’ve learned the hard way that skipping the bun toasting or rushing the cheese melt ruins the whole slider experience. Taking these small steps really pays off and makes these sliders stand out.
Variations & Adaptations
Want to switch things up? Here are some tasty ways to customize these sliders for different tastes and occasions:
- Spicy Jalapeño Bacon Sliders: Add thinly sliced jalapeños or a dash of hot sauce to the beef mix for a fiery kick.
- Veggie-Friendly Option: Swap beef patties for black bean or lentil patties, and use dairy-free cheese for a delicious vegetarian slider.
- Seasonal Twist: In fall, try adding caramelized onions and a smear of fig jam for a sweet-savory combo that pairs beautifully with the bacon.
- Gluten-Free Slider: Use gluten-free buns or wrap sliders in large lettuce leaves for a low-carb alternative.
- Personal Favorite: I once tried adding a touch of blue cheese crumbles on top of the cheddar before melting — it added a tangy surprise that guests loved.
These tweaks make the sliders versatile enough for any crowd or craving, proving that little changes can have big flavor impacts.
Serving & Storage Suggestions
These sliders are best served warm, fresh from the oven, with melted cheese still gooey and bacon crisp. Arrange them on a platter with toothpicks for easy grabbing at parties.
Pair them with classic sides like crispy fries, coleslaw, or a fresh garden salad. For drinks, craft beers or fizzy sodas complement the savory richness perfectly.
To store, wrap leftover sliders tightly and refrigerate for up to 3 days. Reheat in a 350°F (175°C) oven for 8-10 minutes to warm through without drying out. Avoid microwaving if you want to keep the buns from getting soggy.
Sliders also freeze well — separate layers with parchment paper and freeze in an airtight container for up to 1 month. Thaw overnight in the fridge before reheating gently in the oven.
Over time, the flavors meld nicely if you let the sliders rest a few minutes before serving, especially if you add any sauces. This little patience pays off in flavor depth.
Nutritional Information & Benefits
Each slider contains approximately 180-220 calories, depending on exact ingredients. They provide a satisfying mix of protein from the beef and bacon, calcium from cheddar cheese, and some carbs from the buns.
Key ingredients like smoked paprika and garlic powder add antioxidants and anti-inflammatory benefits. The recipe can be modified easily for lower-carb, gluten-free, or dairy-free diets.
While sliders are indulgent party treats, using quality beef and fresh ingredients means you’re serving a wholesome, protein-packed snack that fills everyone up without the need for heavy sides.
From a wellness perspective, enjoying these sliders mindfully—paired with veggies or salads—makes them a balanced and satisfying option that doesn’t feel like a compromise.
Conclusion
If you’re looking for a no-fuss, crowd-pleasing recipe that feels like a little celebration in every bite, these Savory Ultimate Bacon Cheeseburger Sliders are calling your name. Easy to make, packed with flavor, and perfect for any gathering, they hit all the right notes.
Feel free to tweak the toppings or seasonings to match your taste buds or dietary needs—this recipe is flexible and forgiving, just like a good friend. Honestly, I keep coming back to these sliders because they remind me of that casual Saturday afternoon in Jess’s kitchen when something simple turned into something unforgettable.
Give these sliders a try, share your favorite variations, and let me know how they steal the show at your next party. I can’t wait to hear what you think!
FAQs
Can I prepare these sliders ahead of time?
Yes! You can cook the patties and bacon a day in advance and assemble the sliders just before serving. Keep components refrigerated separately for best freshness.
What’s the best way to reheat leftover sliders?
Reheat in a 350°F (175°C) oven for 8-10 minutes to keep buns from getting soggy and cheese melty. Avoid microwaving if possible.
Can I make these sliders without bacon?
Absolutely! The bacon adds smoky crunch but the sliders are delicious on their own or with other toppings like sautéed mushrooms or caramelized onions.
How do I keep the slider buns from getting soggy?
Toasting the buns with melted butter before assembling helps create a barrier. Serve sliders soon after assembling to maintain texture.
Are these sliders freezer-friendly?
Yes, you can freeze assembled sliders separated by parchment paper in an airtight container for up to one month. Thaw overnight in the fridge before reheating gently.
Pin This Recipe!
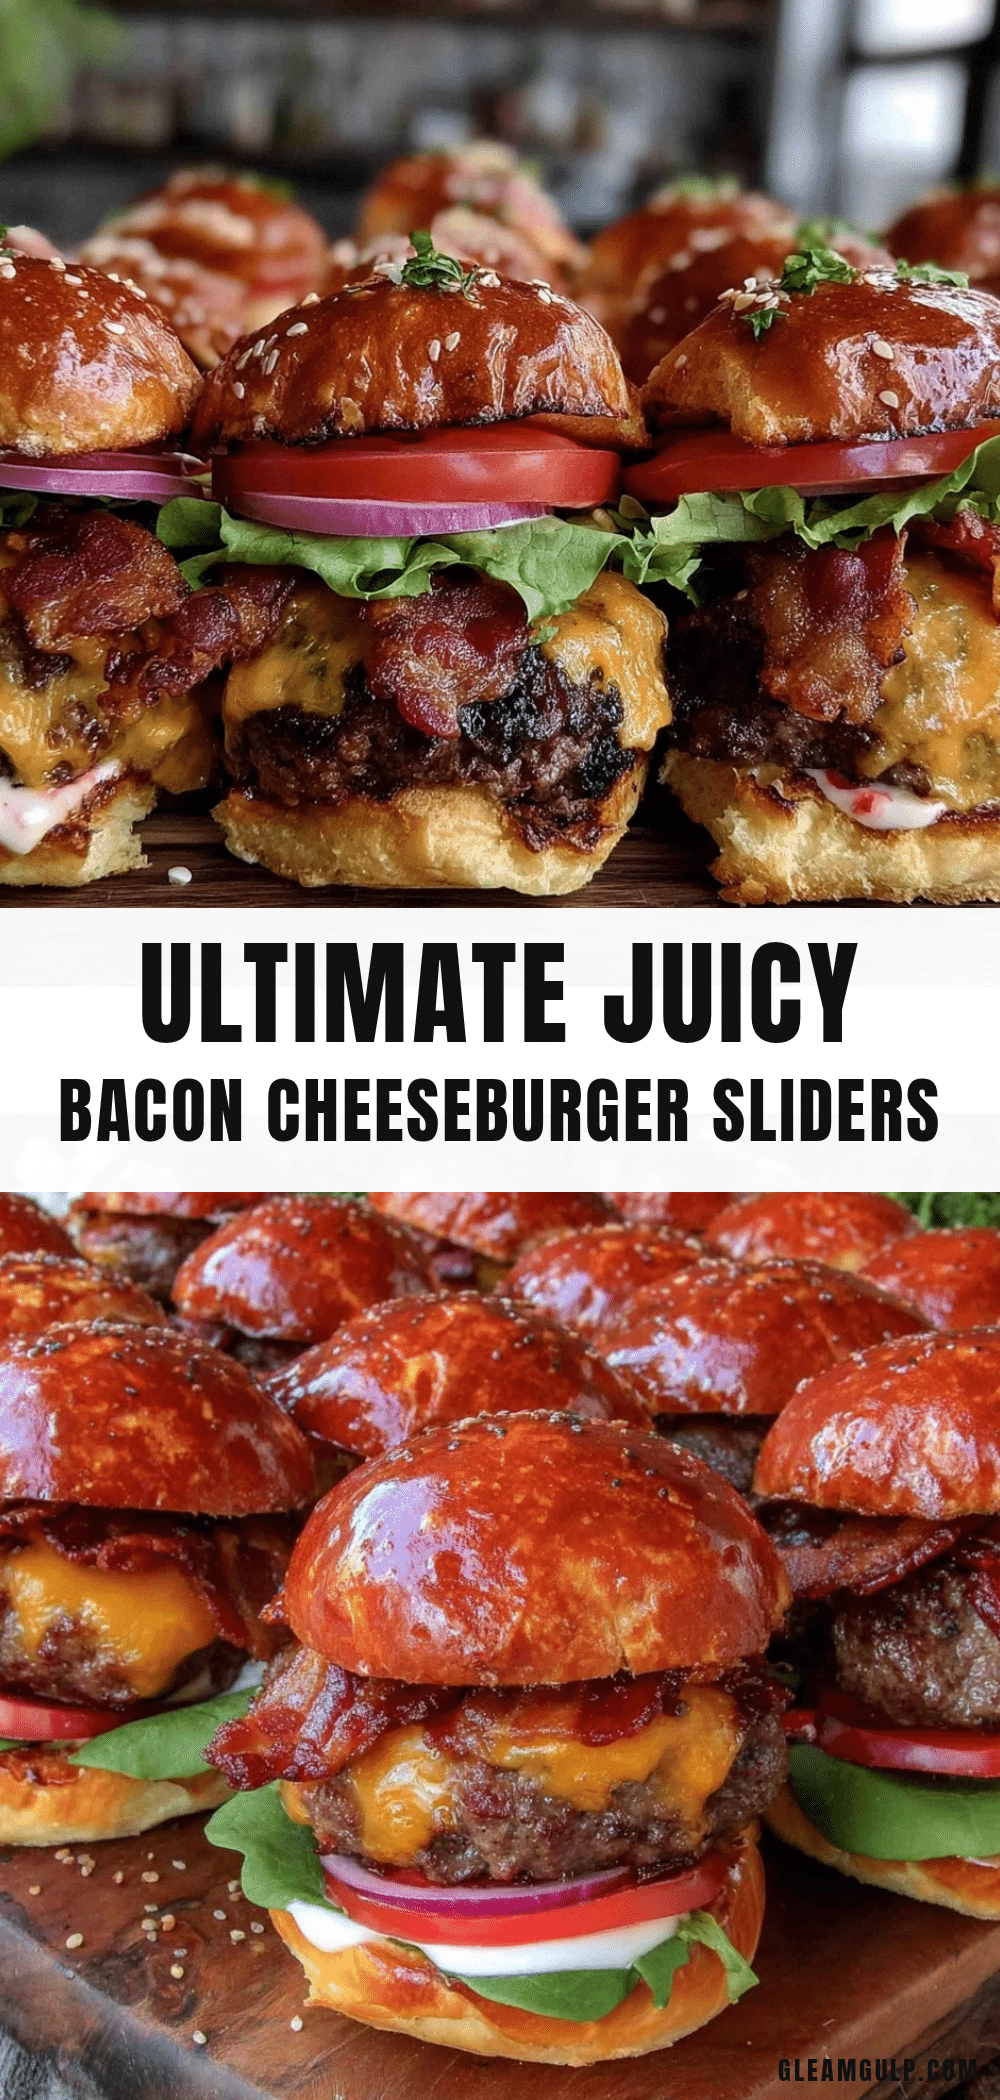
Savory Ultimate Bacon Cheeseburger Sliders Recipe Easy Party Bites

These savory bacon cheeseburger sliders are quick and easy party bites that combine juicy beef, crispy bacon, and melted cheddar cheese on soft slider buns. Perfect for gatherings, game nights, or casual hangouts.
- Prep Time: 10 minutes
- Cook Time: 20 minutes
- Total Time: 30 minutes
- Yield: 12 sliders 1x
- Category: Appetizer
- Cuisine: American
Ingredients
- 1 lb (450 g) ground beef (80/20 blend)
- 6–8 smoked bacon strips, crisped and chopped
- 6 slices sharp cheddar cheese
- 12 small slider buns (King’s Hawaiian recommended)
- 2 tbsp yellow mustard
- 2 tbsp ketchup
- 1/2 cup dill pickles, thinly sliced
- 2 tbsp butter, melted
- 1 tsp salt
- 1/2 tsp freshly ground black pepper
- 1/2 tsp smoked paprika
- 1/4 tsp garlic powder
Instructions
- Preheat oven to 350°F (175°C). Line a baking sheet with parchment paper or foil.
- Heat a skillet on medium-high. Cook bacon strips until crispy, about 6-8 minutes, flipping halfway. Drain on paper towels and chop once cooled.
- In a bowl, combine ground beef with salt, pepper, smoked paprika, and garlic powder. Mix gently without overworking.
- Divide beef into 12 equal portions (~1.3 oz / 38 g each). Form into balls and flatten slightly. Make a small indentation in the center of each patty with your thumb.
- Cook patties in the skillet without crowding, about 3 minutes per side for medium. One minute before done, place a slice of cheddar on each patty to melt.
- Brush cut sides of slider buns with melted butter. Place on baking sheet and toast in oven for 5-7 minutes until golden.
- Assemble sliders by spreading mustard on bottom buns, adding cheesy patties, topping with bacon and pickle slices, then a drizzle of ketchup. Cap with top buns.
- Return assembled sliders to baking sheet and warm in oven for 3-5 minutes to meld flavors and keep cheese gooey.
- Serve warm and enjoy.
Notes
Handle the meat gently to avoid tough patties. Use the thumb indentation trick to prevent patties from puffing up. Toast buns with melted butter to prevent sogginess. Add cheese just before finishing cooking for perfect melt. Sliders can be made ahead by cooking patties and bacon in advance and assembling before serving. Reheat in oven to maintain texture.
Nutrition
- Serving Size: 1 slider
- Calories: 200
- Sugar: 2
- Sodium: 450
- Fat: 13
- Saturated Fat: 6
- Carbohydrates: 12
- Fiber: 1
- Protein: 12
Keywords: bacon cheeseburger sliders, party bites, easy sliders, game day snacks, bacon cheeseburger recipe, slider buns, quick appetizers


