Love this? Save it for later!
Share the inspiration with your friends
Introduction
This was supposed to be a routine berry smoothie experiment gone right. I grabbed the wrong fruit—blueberries instead of strawberries, the blender lid was barely on, and I was already late for a Zoom call when disaster struck. The smoothie splattered everywhere, turning my counter into a blueberry battlefield. Honestly, I thought the whole day was ruined. But then, as I scraped the mess into popsicle molds on a whim, I realized what I’d stumbled upon was nothing like the plan—and way better.
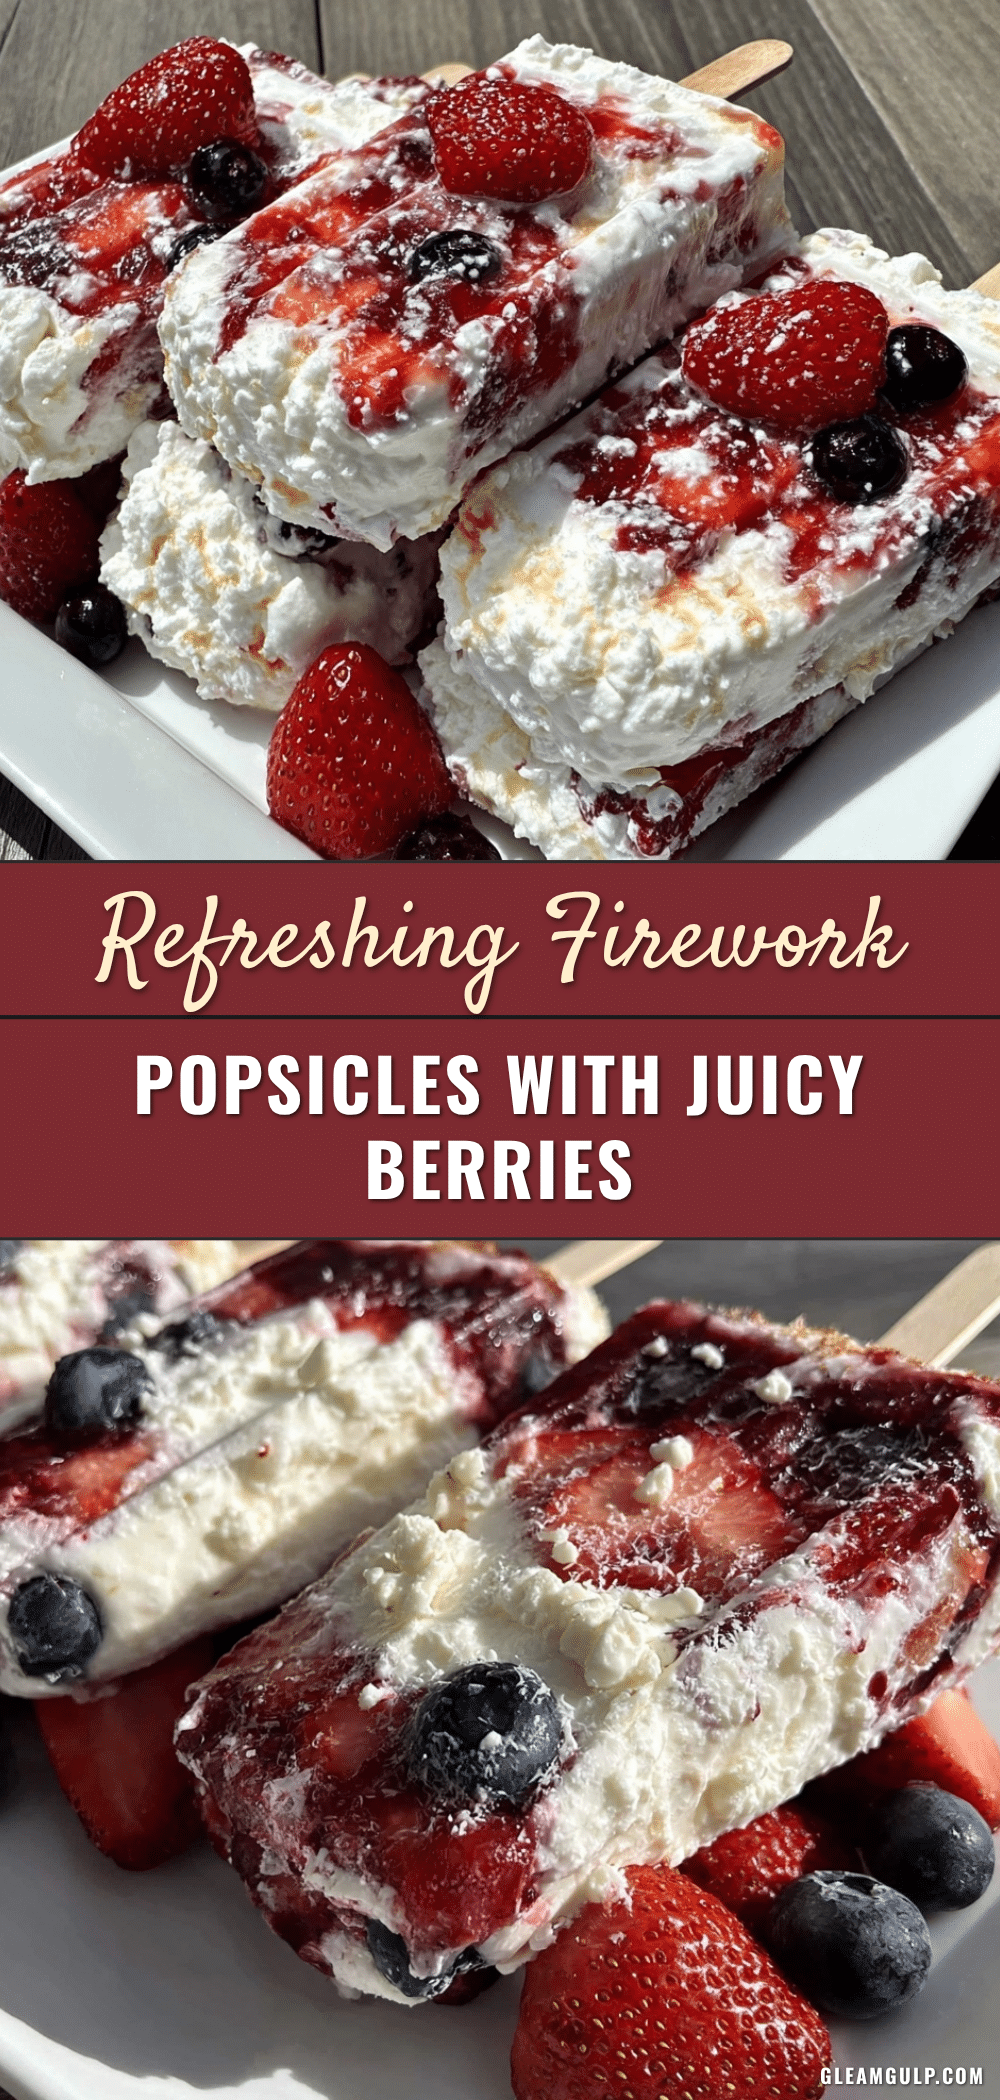
You know that feeling when a kitchen mishap turns into a cool discovery? That’s exactly how these Refreshing Firework Popsicles with Fresh Berries came to be. They’re simple, vibrant, and honestly, a little sparkly with their bursting colors—kind of like a summer celebration in your mouth.
Maybe you’ve been there too: juggling ingredients, distracted by a phone call, and ending up with a surprise recipe that sticks. I still laugh when I remember the cracked bowl and the blueberry-stained counter, but these popsicles stayed with me after that chaotic morning. I keep making them when the heat hits just right or when I want a fuss-free, refreshing treat that reminds me that sometimes mistakes are just the start of something delicious.
Why You’ll Love This Recipe
Let me tell you, after testing this recipe more times than I can count (you know, to make sure the first happy accident wasn’t just beginner’s luck), these popsicles have become an essential for hot days. Here’s why I think you’ll adore making and eating them:
- Quick & Easy: Ready in under 10 minutes, no fancy prep needed—perfect for busy afternoons or last-minute summer fun.
- Simple Ingredients: Only four ingredients that are likely hiding in your fridge or pantry right now—fresh berries, juice, a little sweetener, and water.
- Perfect for Summer Gatherings: These popsicles bring a festive vibe to backyard barbecues, pool parties, or just a chill day on the porch.
- Crowd-Pleaser: Kids and adults alike go nuts for the refreshing flavors and colorful berry bursts.
- Unbelievably Delicious: The texture is icy yet smooth, with natural sweetness balanced by the tang of fresh berries—honestly, it’s like eating a cool firework.
What makes these popsicles different? It’s the way the fresh berries remain distinct inside the popsicle, creating a playful, eye-catching texture and flavor combo. Plus, the minimal ingredients mean no preservatives or weird additives—just pure, summery goodness.
This recipe isn’t just a treat; it’s a little reminder that sometimes, less really is more, and a small kitchen slip can lead to a new favorite. If you’re after a simple but show-stopping summer snack, you’ll want to keep these in your freezer.
What Ingredients You Will Need
This recipe uses simple, wholesome ingredients to deliver bold flavor and satisfying texture without the fuss. All are easy-to-find and mostly pantry or fridge staples, which means no last-minute grocery runs.
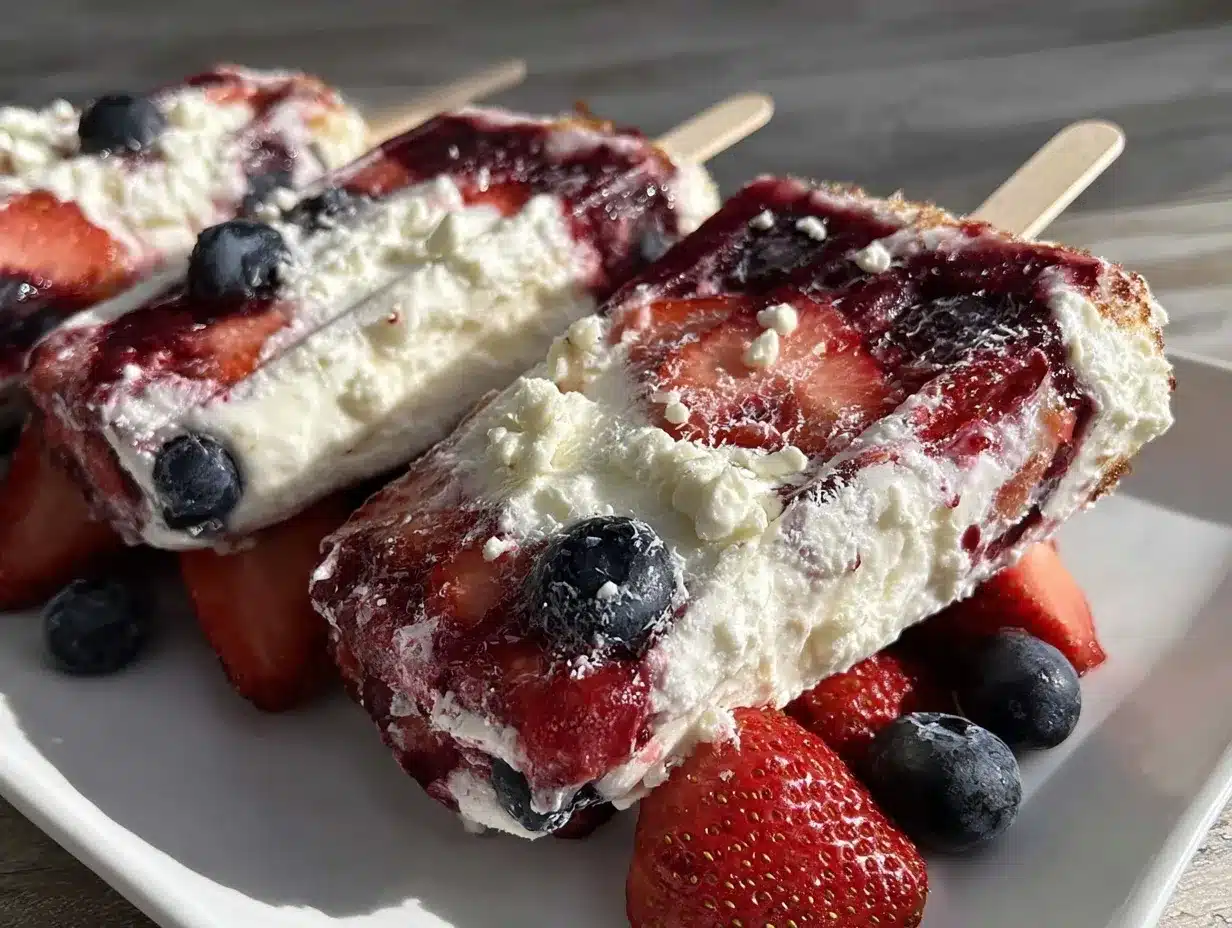
- Fresh Berries (1 cup / 150 g) – A mix of strawberries, blueberries, and raspberries works beautifully. I prefer organic when I can find it at my local farmer’s market, but any fresh berries will do. Frozen can work too, just thaw slightly.
- 100% Fruit Juice (1 cup / 240 ml) – I recommend white grape or apple juice for a mild sweetness that lets the berry flavors shine. You can swap for orange juice if you want a citrus twist.
- Honey or Maple Syrup (2 tablespoons) – Adds a touch of natural sweetness. If you’re vegan, maple syrup is your friend here. Feel free to adjust sweetness to taste.
- Cold Water (½ cup / 120 ml) – This dilutes the juice slightly to keep the popsicles refreshingly light and icy.
That’s it! Seriously, just four ingredients that come together to create a vibrant, delicious summer treat. If you want a twist, you can toss in a few mint leaves or a splash of lemon juice for extra zing.
Equipment Needed
- Popsicle Molds: Essential for shaping your popsicles. I use silicone molds because they make it easier to pop the treats out without cracking them. If you don’t have molds, small paper cups with wooden sticks work fine in a pinch.
- Blender or Food Processor: To gently pulse the berries and mix the juice and sweetener. A regular blender works perfectly; no need for anything fancy.
- Measuring Cups and Spoons: For accurate ingredient amounts—trust me, it makes a difference for consistency.
- Mixing Bowl: Handy for combining juice and water before adding to berries.
For budget-friendly options, I’ve found that silicone muffin trays plus popsicle sticks can substitute for molds without breaking the bank. Also, keeping your molds in the freezer beforehand helps the popsicles set faster. Don’t forget to rinse your blender right after use to avoid stubborn berry stains!
Preparation Method
- Prepare the Berries: Rinse 1 cup (150 g) of fresh berries under cold water. Pat dry gently with a paper towel. If using strawberries, hull and cut them into halves or quarters for easier blending. (Approx. 5 minutes)
- Pulse the Berries: Add the berries to your blender or food processor. Pulse gently 4-5 times to break them down but not puree completely—you want those pretty berry chunks to stay visible for that firework effect. (1-2 minutes)
- Mix Juice and Sweetener: In a mixing bowl, combine 1 cup (240 ml) of fruit juice with 2 tablespoons of honey or maple syrup. Stir until the sweetener dissolves. (2 minutes)
- Add Water: Stir in ½ cup (120 ml) of cold water to lighten the mixture. This makes the popsicles icy without being overly sweet. (30 seconds)
- Combine Mixtures: Pour the juice mixture into the blender with the pulsed berries. Give it a quick pulse just to mix evenly—avoid overblending. (1 minute)
- Fill the Molds: Spoon the mixture into your popsicle molds, leaving a little space at the top for expansion. Insert sticks if your molds require it. (5 minutes)
- Freeze: Place the molds in the freezer for at least 4 hours, preferably overnight, until fully set. (4+ hours)
- Unmold and Enjoy: To release the popsicles, run warm water over the molds’ exterior for a few seconds and gently pull. (1 minute)
Pro tip: If you find the berries sinking to the bottom during freezing, stir the mixture in the molds once or twice during the first hour to distribute evenly. Also, the popsicles will have a slightly softer texture if you let them sit out for 2-3 minutes before eating.
Cooking Tips & Techniques
Making these popsicles is straightforward, but a few tips will help you avoid common hiccups and get the best results every time:
- Don’t Overblend the Berries: I’ve made the mistake of turning the berries into juice, losing that fun, chunk-filled texture. Pulsing keeps the berry bits intact, which is part of the charm.
- Sweetness Level: Taste your juice mixture before freezing. Everyone’s sweet tooth differs, so start with 2 tablespoons of honey or maple syrup and add more if you like.
- Freeze Time: Be patient. Rushing the freeze can leave your popsicles slushy rather than solid. If you’re short on time, try freezing the mixture in a shallow metal pan and scraping it with a fork every 30 minutes to create a granita texture.
- Multitasking Trick: While the popsicles freeze, you can whip up a batch of crispy garlic chicken for a quick dinner. Trust me, it’s a crowd-pleaser and pairs perfectly with these fruity treats after a hot day.
- Storage: Keep your popsicles in an airtight container or plastic bag once unmolded to avoid freezer burn or absorbing other odors.
From personal experience, the best batches come when I relax and don’t stress about perfection—let the berries do their thing and enjoy the process (and the mess) along the way.
Variations & Adaptations
These popsicles are like a blank canvas—you can tailor them to your taste buds or dietary needs easily:
- Dietary Variation: For a dairy-free and vegan-friendly treat, stick to maple syrup and fruit juice. You can also swap water for coconut water for added electrolytes and a tropical twist.
- Seasonal Variation: In autumn, mix in chopped apple or pear bits and use apple cider instead of juice. In summer, fresh watermelon chunks or mango cubes work wonders.
- Flavor Boost: Add a splash of fresh lemon or lime juice to brighten the flavors. A few torn mint leaves or basil can add an herbal note that’s surprisingly refreshing.
- Alternative Freeze Methods: Make popsicle bites by freezing the mixture in silicone mini muffin trays—great for portion control and kids.
- Personal Twist: Once, I added a teaspoon of chia seeds for texture and a nutrition boost—they soak up the juice and add a fun little crunch.
Serving & Storage Suggestions
Serve your Refreshing Firework Popsicles with Fresh Berries straight from the freezer for the coolest, most refreshing bite. They’re perfect as a palate cleanser after spicy meals or as a midday refresher.
Present them on a pretty platter lined with fresh mint leaves or a scattering of extra berries for a festive look. They pair beautifully with light dishes like grilled chicken or a fresh summer salad.
To store, keep popsicles in their molds or transfer them to a freezer-safe airtight container or resealable bag. They last up to 2 weeks without losing flavor or texture.
When reheating (if you want a softer texture), leave Popsicles out at room temperature for about 3-5 minutes or run warm water over the mold. Note that the flavors mellow slightly as they thaw, which some folks prefer.
Nutritional Information & Benefits
Each pop is roughly 60-80 calories, depending on sweetener and juice choices, making them a guilt-free summer snack. The fresh berries pack antioxidants and vitamin C, which support your immune system and skin health.
Using natural sweeteners and pure fruit juice keeps added sugars low compared to store-bought popsicles laden with artificial flavors.
This recipe can be made gluten-free, dairy-free, and vegan, checking most dietary boxes while still tasting like a treat.
From a wellness perspective, I love that these popsicles hydrate and refresh without any artificial junk—just real fruit and simple ingredients that you can feel good about.
Conclusion
If you’re looking for a fun, easy, and surprisingly sophisticated summer treat, these Refreshing Firework Popsicles with Fresh Berries are exactly what you need. They’re a reminder that sometimes the best recipes come from a little kitchen chaos and a willingness to experiment.
Feel free to make them your own—swap berries, tweak sweetness, or add herbs to suit your taste. Honestly, I keep coming back to this recipe because it’s quick, delightful, and just plain fun to eat.
Give it a try, and when you do, I’d love to hear how your popsicles turned out or what variations you created. Share your stories, questions, or tips in the comments below—let’s keep the summer fun rolling!
Here’s to cool treats and happy kitchen accidents!
FAQs
- Can I use frozen berries instead of fresh?
Yes! Just thaw them slightly before blending to avoid ice crystals affecting texture. - How long do these popsicles last in the freezer?
Up to 2 weeks when stored in an airtight container. - Can I make these without a blender?
You can mash berries by hand with a fork for a chunkier texture, but a blender makes mixing easier. - What if I don’t have popsicle molds?
Use small paper cups and insert wooden sticks or try silicone muffin trays as alternatives. - Can I make these sugar-free?
Yes, you can skip the sweetener if your fruit is ripe and naturally sweet or use a sugar-free syrup.
Pin This Recipe!
Refreshing Firework Popsicles Recipe 4-Ingredient Easy Summer Treat with Fresh Berries
A simple and vibrant popsicle recipe featuring fresh berries, fruit juice, natural sweetener, and water. Perfect for a quick, refreshing summer treat with a playful texture and colorful berry bursts.
- Prep Time: 10 minutes
- Cook Time: 4 hours
- Total Time: 4 hours 10 minutes
- Yield: 6 popsicles 1x
- Category: Dessert
- Cuisine: American
Ingredients
- 1 cup (150 g) fresh berries (strawberries, blueberries, raspberries)
- 1 cup (240 ml) 100% fruit juice (white grape or apple juice recommended)
- 2 tablespoons honey or maple syrup
- ½ cup (120 ml) cold water
Instructions
- Rinse 1 cup (150 g) of fresh berries under cold water and pat dry. Hull and cut strawberries into halves or quarters.
- Add berries to a blender or food processor and pulse gently 4-5 times to break them down but keep chunks visible.
- In a mixing bowl, combine 1 cup (240 ml) fruit juice with 2 tablespoons honey or maple syrup and stir until dissolved.
- Stir in ½ cup (120 ml) cold water to the juice mixture.
- Pour the juice mixture into the blender with the pulsed berries and pulse once to mix evenly without overblending.
- Spoon the mixture into popsicle molds, leaving space at the top. Insert sticks if needed.
- Freeze molds for at least 4 hours or overnight until fully set.
- To unmold, run warm water over the molds for a few seconds and gently pull out the popsicles.
Notes
Do not overblend the berries to keep chunks visible for texture. Stir the mixture in molds once or twice during the first hour of freezing to prevent berries from sinking. Let popsicles sit out 2-3 minutes before eating for a softer texture. Store in airtight containers to avoid freezer burn. Variations include using coconut water instead of water, adding mint or lemon juice, or freezing in mini muffin trays for popsicle bites.
Nutrition
- Serving Size: 1 popsicle
- Calories: 70
- Sugar: 14
- Sodium: 5
- Fat: 0.2
- Carbohydrates: 18
- Fiber: 2
- Protein: 0.5
Keywords: popsicles, summer treat, fresh berries, easy recipe, healthy snack, natural sweetener, fruit juice, vegan, gluten-free


