Love this? Save it for later!
Share the inspiration with your friends
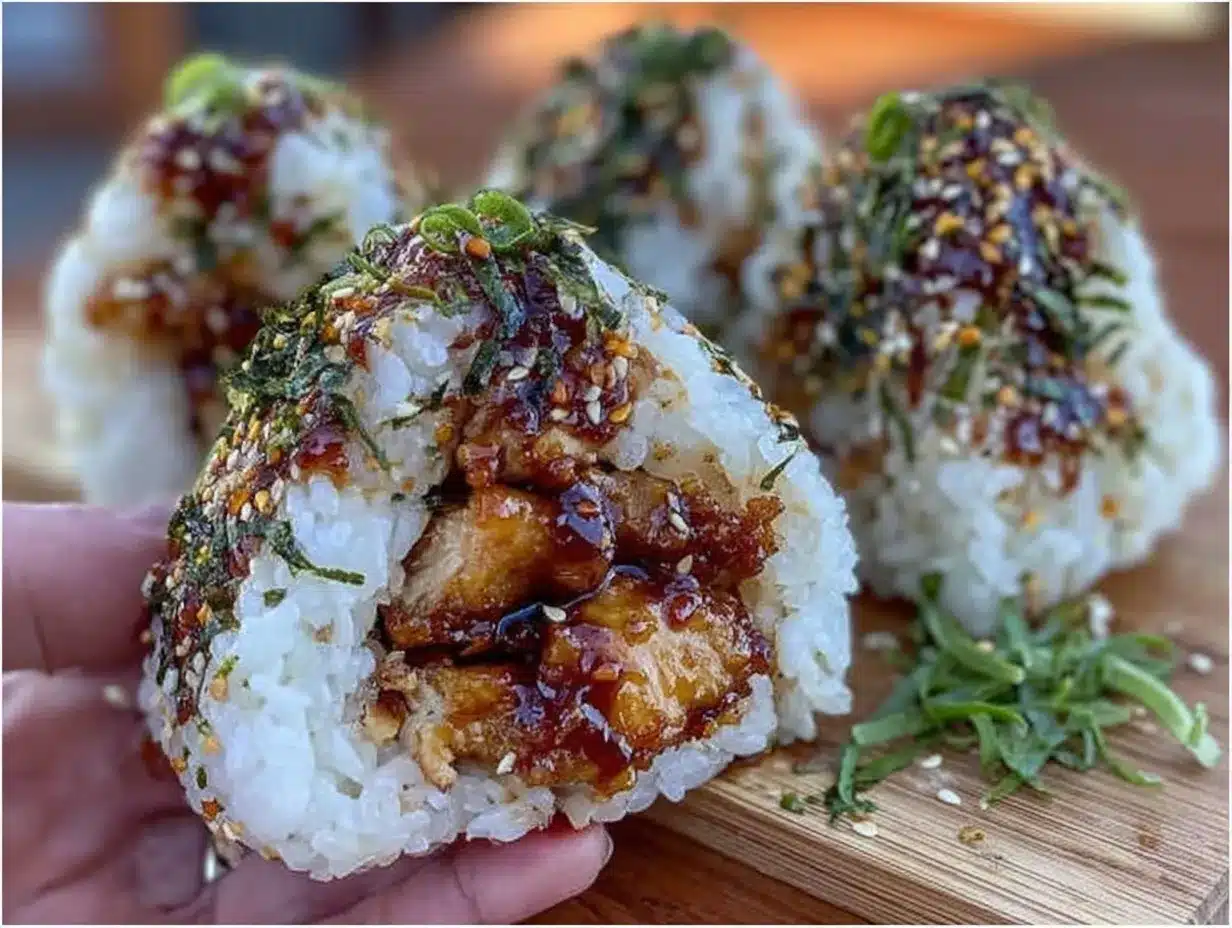
“You ever get those random cravings at 2 PM, when the whole day feels like it’s dragging, and nothing in the fridge looks exciting?” That’s exactly where I was one Friday afternoon when my friend Kenji called me up, asking if I wanted to crash his place for a quick snack. I wasn’t expecting much—just some chips or maybe leftover pizza. But what he pulled out completely surprised me: Easy Savory Teriyaki Chicken Onigiri Rice Balls. Honestly, the way those little rice balls were packed with tender chicken glazed in sticky teriyaki sauce, wrapped lightly in nori—it was like a snack and a meal rolled into one.
The sound of the rice pressing under his fingers, the sweet-salty aroma of teriyaki, and the way the nori crinkled softly as he handed me one—let me tell you, it was an experience. I remember almost dropping one because I got distracted by a call halfway through shaping them. Maybe you’ve been there, juggling too many things but still needing that perfect bite to reset your day. That afternoon, those onigiri rice balls totally changed my snack game. I’ve made them a dozen times since, always tweaking little things to get that balance just right. And I’m excited to share this simple, savory recipe that anyone can make at home, even if you’re not a sushi pro or haven’t handled sticky rice before.
Why You’ll Love This Recipe
Let me tell you why this Easy Savory Teriyaki Chicken Onigiri Rice Balls recipe quickly became one of my go-to snacks:
- Quick & Easy: Ready in under 30 minutes, it’s perfect for those moments when you want something tasty without fuss.
- Simple Ingredients: You don’t need exotic stuff—just staple pantry and fridge items like chicken, soy sauce, rice, and nori sheets.
- Perfect for On-the-Go: These rice balls are portable and mess-free, making them ideal for lunchboxes, picnics, or a casual snack while binge-watching your favorite show.
- Crowd-Pleaser: I’ve brought these to potlucks and seen how fast they disappear—kids and adults alike can’t get enough.
- Unbelievably Delicious: The sticky teriyaki glaze paired with fluffy sushi rice and a hint of seaweed flavor hits all the right spots.
What sets this recipe apart? I use a quick homemade teriyaki sauce that balances sweetness and savoriness perfectly, and the technique for shaping the onigiri is foolproof—even if you’re new to Japanese rice balls. Plus, I’ve added a little twist by seasoning the rice subtly before shaping, giving every bite a consistent flavor burst. Honestly, this isn’t just another onigiri recipe—it’s the one I keep coming back to when I want comfort food that’s easy, fun, and just a little bit special.
What Ingredients You Will Need
This recipe uses simple, wholesome ingredients to deliver bold flavor and satisfying texture without the fuss. Most are pantry staples, with a few easy-to-find fresh items, and substitutions when needed.
- For the Teriyaki Chicken:
- 1 lb (450g) boneless, skinless chicken thighs, cut into bite-sized pieces (I prefer thighs for juiciness)
- 3 tablespoons soy sauce (Kikkoman is my go-to for consistency)
- 2 tablespoons mirin (sweet rice wine; can substitute with 1 tbsp sugar + 1 tbsp water if needed)
- 2 tablespoons sake (optional but adds depth; omit if unavailable)
- 1 tablespoon honey or brown sugar (for that sticky glaze)
- 1 teaspoon grated fresh ginger (adds brightness)
- 1 garlic clove, minced (for savory punch)
- 1 teaspoon toasted sesame oil (for nutty aroma)
- For the Rice Balls:
- 2 cups Japanese short-grain rice (sushi rice), rinsed thoroughly (important for stickiness)
- 2 1/4 cups water (adjust slightly depending on rice brand)
- 1 tablespoon rice vinegar (lightly seasons rice without overpowering)
- 1 teaspoon sugar (balances vinegar)
- 1/2 teaspoon salt
- 4–6 sheets nori (dried seaweed), cut into strips or squares
- Optional Garnishes:
- Toasted sesame seeds (adds texture and flavor)
- Pickled ginger or sliced cucumbers (fresh contrast)
If you want a gluten-free option, just swap soy sauce for tamari. I also recommend using fresh ginger over powder for the best zing. Depending on your flavor preference, you can tweak the sweetness of the teriyaki glaze—just taste as you go!
Equipment Needed
- Rice cooker or medium saucepan with a tight-fitting lid (for perfectly cooked sushi rice)
- Mixing bowl (to prepare teriyaki sauce)
- Non-stick skillet or frying pan (for cooking chicken)
- Wooden spatula or silicone spatula (to stir without scratching)
- Plastic wrap or damp kitchen towel (to help shape onigiri without sticking)
- Sharp knife (for cutting nori sheets)
- Measuring cups and spoons (for precise ingredient amounts)
Personally, I find a rice cooker makes life easier, especially for this recipe. But if you don’t have one, a good saucepan with a heavy bottom works fine—just don’t peek too often! For shaping the onigiri, some people swear by specialized molds, but I like the hands-on approach; it feels more connected to the process. If you do use plastic wrap, make sure to keep your hands slightly damp to prevent rice from sticking. And hey, if you only have regular soy sauce packets from your favorite sushi spot, those work in a pinch for seasoning!
Preparation Method
- Cook the Sushi Rice: Rinse 2 cups of Japanese short-grain rice under cold water until the water runs clear to remove excess starch. Drain well. Transfer to rice cooker or saucepan and add 2 1/4 cups water. Cook according to your rice cooker’s instructions or bring to a boil, then cover and simmer on low for 15 minutes. Remove from heat and let it rest, covered, for another 10 minutes. This resting allows the rice to steam and become fluffy.
- Season the Rice: While the rice rests, mix 1 tablespoon rice vinegar, 1 teaspoon sugar, and 1/2 teaspoon salt in a small bowl until dissolved. Gently fold this seasoning into the warm rice using a wooden spatula—don’t smash or stir vigorously, just fold to keep the grains intact. Spread the rice out slightly to cool to room temperature (you want it warm but not hot).
- Prepare the Teriyaki Sauce: In a small bowl, whisk together soy sauce, mirin, sake (if using), honey, grated ginger, minced garlic, and sesame oil. Set aside.
- Cook the Chicken: Heat a non-stick skillet over medium heat. Add chicken pieces and cook until lightly browned, about 4–5 minutes. Pour in the teriyaki sauce and reduce heat to low. Simmer, stirring occasionally, until the sauce thickens and coats the chicken, about 5–7 minutes. The chicken should be tender and glazed. Remove from heat and let it cool slightly.
- Shape the Onigiri: Wet your hands with water and sprinkle a pinch of salt on your palms to season the rice and prevent sticking. Take a handful (about 1/3 cup or 70g) of rice and flatten it slightly. Place a spoonful of teriyaki chicken in the center, then mold the rice around the filling, forming a tight triangle or oval shape. Repeat with remaining rice and chicken. If using, wrap a strip or square of nori around each rice ball.
- Serve or Store: Onigiri are best enjoyed fresh but can be wrapped tightly in plastic wrap and refrigerated for up to 24 hours. If you want to reheat, steam gently or microwave covered with a damp paper towel to keep the rice moist.
Quick tip: If your rice feels too sticky or mushy, try reducing the water slightly next time. And don’t rush shaping the onigiri—press firmly but gently to keep them intact without squashing the rice grains. Also, if you’d like a little extra crunch, sprinkle some toasted sesame seeds on top right before serving.
Cooking Tips & Techniques
- Rice Texture Is Key: Sushi rice’s unique stickiness is essential for onigiri. Rinsing the rice well removes excess starch, preventing it from turning gummy. Letting the rice rest after cooking lets moisture distribute evenly.
- Season the Rice Lightly: The vinegar-sugar-salt mix enhances flavor without overpowering. Be gentle folding it in to avoid breaking grains.
- Teriyaki Sauce Balance: Taste your sauce before cooking chicken. Adjust sweetness or saltiness to your liking. Sometimes, a splash more mirin or a pinch more sugar makes all the difference.
- Shaping Onigiri: Wet hands and a pinch of salt are secret weapons to keep rice from sticking and add seasoning. Press firmly to hold shape, but don’t overdo it or the rice will get dense.
- Use Fresh Ingredients: Fresh ginger and garlic make the teriyaki sauce pop in flavor. If you don’t have fresh, use quality powders sparingly.
- Avoid Overcooking Chicken: Cook just until done to keep it tender. Overcooked chicken can dry out and make the onigiri less enjoyable.
- Multitasking: While rice cooks, prep the chicken and sauce. This keeps the whole process under 30 minutes, making it perfect for busy days.
Variations & Adaptations
There’s plenty of room to make these onigiri your own:
- Vegetarian Version: Swap chicken for sautéed mushrooms or marinated tofu cubes in the teriyaki glaze. Mushrooms soak up flavors beautifully.
- Spicy Kick: Add a dash of sriracha or chili flakes to the teriyaki sauce for heat lovers. Or mix spicy mayo inside the rice ball.
- Different Fillings: Try salmon flakes, pickled plum (umeboshi), or cooked shrimp for variety. Each brings a unique taste and texture.
- Different Cooking Methods: Instead of pan-frying chicken, grill or bake it for a smokier flavor. Just glaze afterward.
- Gluten-Free Adjustment: Use tamari instead of soy sauce to keep it gluten-free without sacrificing flavor.
One time, I swapped out the chicken for leftover teriyaki beef strips and it was surprisingly delicious—adds a richer, beefy vibe but keeps the comforting balance. Feel free to experiment with what you have on hand!
Serving & Storage Suggestions
Serve these Easy Savory Teriyaki Chicken Onigiri Rice Balls warm or at room temperature. They pair beautifully with pickled vegetables or a simple miso soup to round out the meal. For drinks, green tea or a light lager complements the savory-sweet flavors perfectly.
If you’re prepping ahead, wrap each onigiri individually with plastic wrap or beeswax wrap and store in the refrigerator for up to 24 hours. For longer storage, freeze them in a single layer on a baking sheet, then transfer to a freezer bag—thaw overnight in the fridge before reheating gently.
When reheating, cover with a damp paper towel and microwave in short bursts to keep the rice moist and tender. The flavors actually deepen a bit after sitting, so leftovers can be even more satisfying the next day.
Nutritional Information & Benefits
One serving of onigiri (about 1 rice ball) provides approximately 250-300 calories, with a balanced mix of carbohydrates from the sushi rice and protein from the chicken. The teriyaki sauce adds flavor without excessive fat, especially when using lean chicken thighs.
Key ingredients like ginger and garlic bring antioxidants and anti-inflammatory properties, while sesame oil contributes healthy fats. This recipe is naturally gluten-free if you select tamari over soy sauce and is a good option for a satisfying snack or light meal that keeps you energized.
From a wellness perspective, the combination of protein and carbs makes these onigiri great for sustained energy—perfect for a midday boost or a post-workout snack.
Conclusion
Easy Savory Teriyaki Chicken Onigiri Rice Balls are proof that simple ingredients, when combined thoughtfully, can create something truly special. Whether you’re new to Japanese cooking or a seasoned fan, this recipe offers a fun, hands-on way to enjoy a comforting snack that’s packed with flavor and texture.
Feel free to tweak the filling or seasoning to suit your tastes—cooking should always be a little adventure, right? Personally, I love how these rice balls bring a touch of joy and nostalgia every time I make them. Give them a try, and I’d love to hear how you customize your version or what memories they bring up for you.
Don’t hesitate to share your thoughts or questions below, and happy cooking!
Frequently Asked Questions
- What type of rice is best for onigiri? Japanese short-grain sushi rice is best because it’s sticky enough to hold the shape but still tender.
- Can I use leftover cooked chicken for this recipe? Yes! Just toss it in the teriyaki sauce to reheat and glaze before filling the onigiri.
- How do I prevent rice from sticking to my hands when shaping? Wet your hands with water and rub a pinch of salt on your palms before handling the rice.
- Can I make onigiri without nori? Absolutely! Nori adds flavor and helps holding the rice ball, but it’s optional if you don’t like it or don’t have any.
- How long can I store onigiri in the fridge? Store wrapped tightly in the fridge for up to 24 hours. For longer storage, freeze them.
Pin This Recipe!
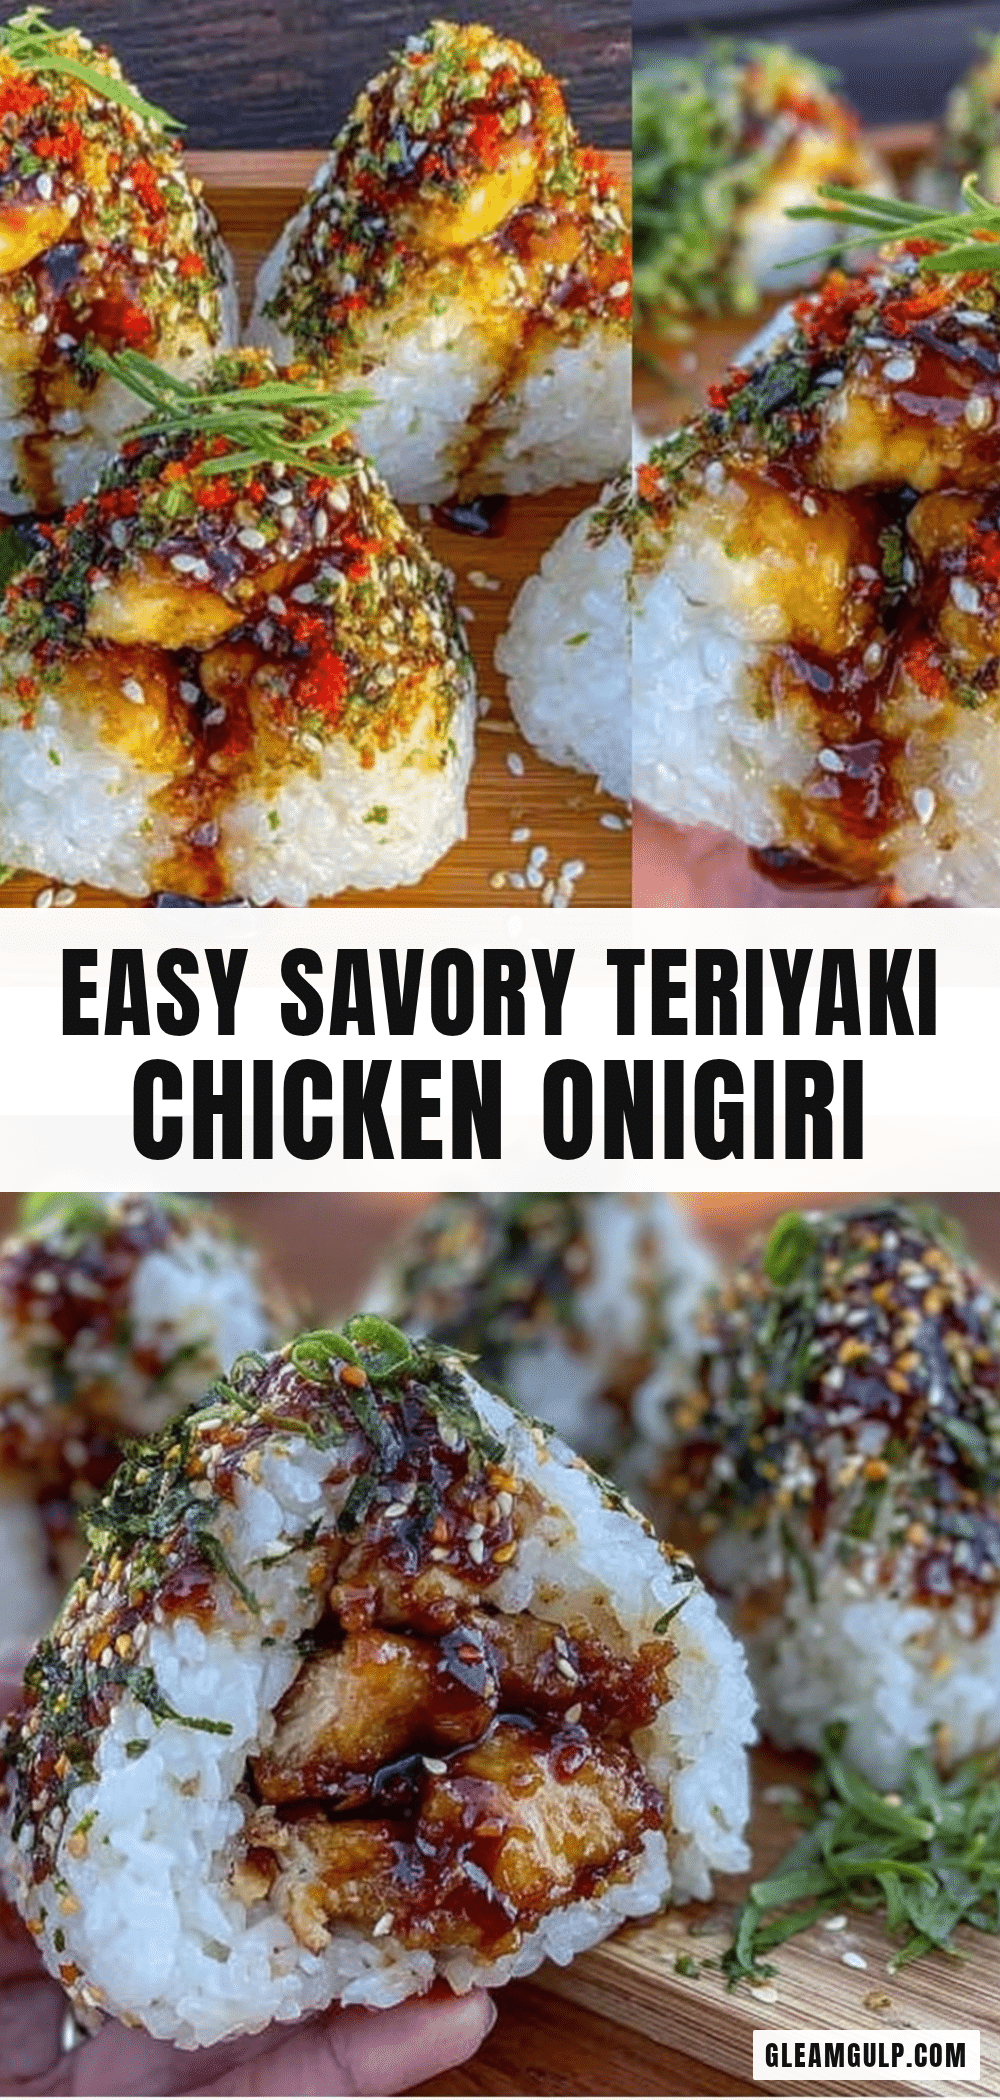
Easy Savory Teriyaki Chicken Onigiri Rice Balls
These savory onigiri rice balls are packed with tender teriyaki-glazed chicken and wrapped in nori, making a perfect quick snack or light meal that’s easy to prepare and delicious.
- Prep Time: 10 minutes
- Cook Time: 20 minutes
- Total Time: 30 minutes
- Yield: 8-10 rice balls 1x
- Category: Snack
- Cuisine: Japanese
Ingredients
- 1 lb boneless, skinless chicken thighs, cut into bite-sized pieces
- 3 tablespoons soy sauce (or tamari for gluten-free)
- 2 tablespoons mirin (or 1 tbsp sugar + 1 tbsp water as substitute)
- 2 tablespoons sake (optional)
- 1 tablespoon honey or brown sugar
- 1 teaspoon grated fresh ginger
- 1 garlic clove, minced
- 1 teaspoon toasted sesame oil
- 2 cups Japanese short-grain sushi rice, rinsed thoroughly
- 2 1/4 cups water
- 1 tablespoon rice vinegar
- 1 teaspoon sugar
- 1/2 teaspoon salt
- 4–6 sheets nori, cut into strips or squares
- Optional garnishes: toasted sesame seeds, pickled ginger, sliced cucumbers
Instructions
- Rinse 2 cups of Japanese short-grain rice under cold water until the water runs clear. Drain well.
- Transfer rice to a rice cooker or medium saucepan and add 2 1/4 cups water. Cook according to rice cooker instructions or bring to a boil, then cover and simmer on low for 15 minutes.
- Remove from heat and let rice rest, covered, for 10 minutes to steam and become fluffy.
- Mix 1 tablespoon rice vinegar, 1 teaspoon sugar, and 1/2 teaspoon salt in a small bowl until dissolved.
- Gently fold the seasoning into the warm rice using a wooden spatula, spreading the rice out slightly to cool to room temperature.
- In a small bowl, whisk together soy sauce, mirin, sake (if using), honey, grated ginger, minced garlic, and sesame oil to prepare teriyaki sauce.
- Heat a non-stick skillet over medium heat. Add chicken pieces and cook until lightly browned, about 4–5 minutes.
- Pour in the teriyaki sauce and reduce heat to low. Simmer, stirring occasionally, until sauce thickens and coats the chicken, about 5–7 minutes. Remove from heat and let cool slightly.
- Wet your hands with water and sprinkle a pinch of salt on your palms to prevent sticking and season the rice.
- Take about 1/3 cup (70g) of rice and flatten it slightly. Place a spoonful of teriyaki chicken in the center, then mold the rice around the filling forming a tight triangle or oval shape.
- Repeat with remaining rice and chicken. Wrap a strip or square of nori around each rice ball if desired.
- Serve immediately or wrap tightly in plastic wrap and refrigerate for up to 24 hours. Reheat gently by steaming or microwaving covered with a damp paper towel.
Notes
Use fresh ginger and garlic for best flavor. Wet hands and sprinkle salt before shaping onigiri to prevent sticking. Adjust sweetness of teriyaki sauce to taste. Rice cooker recommended for perfect rice but saucepan works fine. Onigiri can be stored refrigerated up to 24 hours or frozen for longer storage. Reheat gently to keep rice moist.
Nutrition
- Serving Size: 1 rice ball (about 7
- Calories: 275
- Sugar: 6
- Sodium: 600
- Fat: 7
- Saturated Fat: 1.5
- Carbohydrates: 38
- Fiber: 1
- Protein: 15
Keywords: teriyaki chicken, onigiri, rice balls, Japanese snack, savory snack, easy recipe, quick snack, gluten-free option